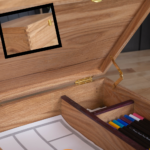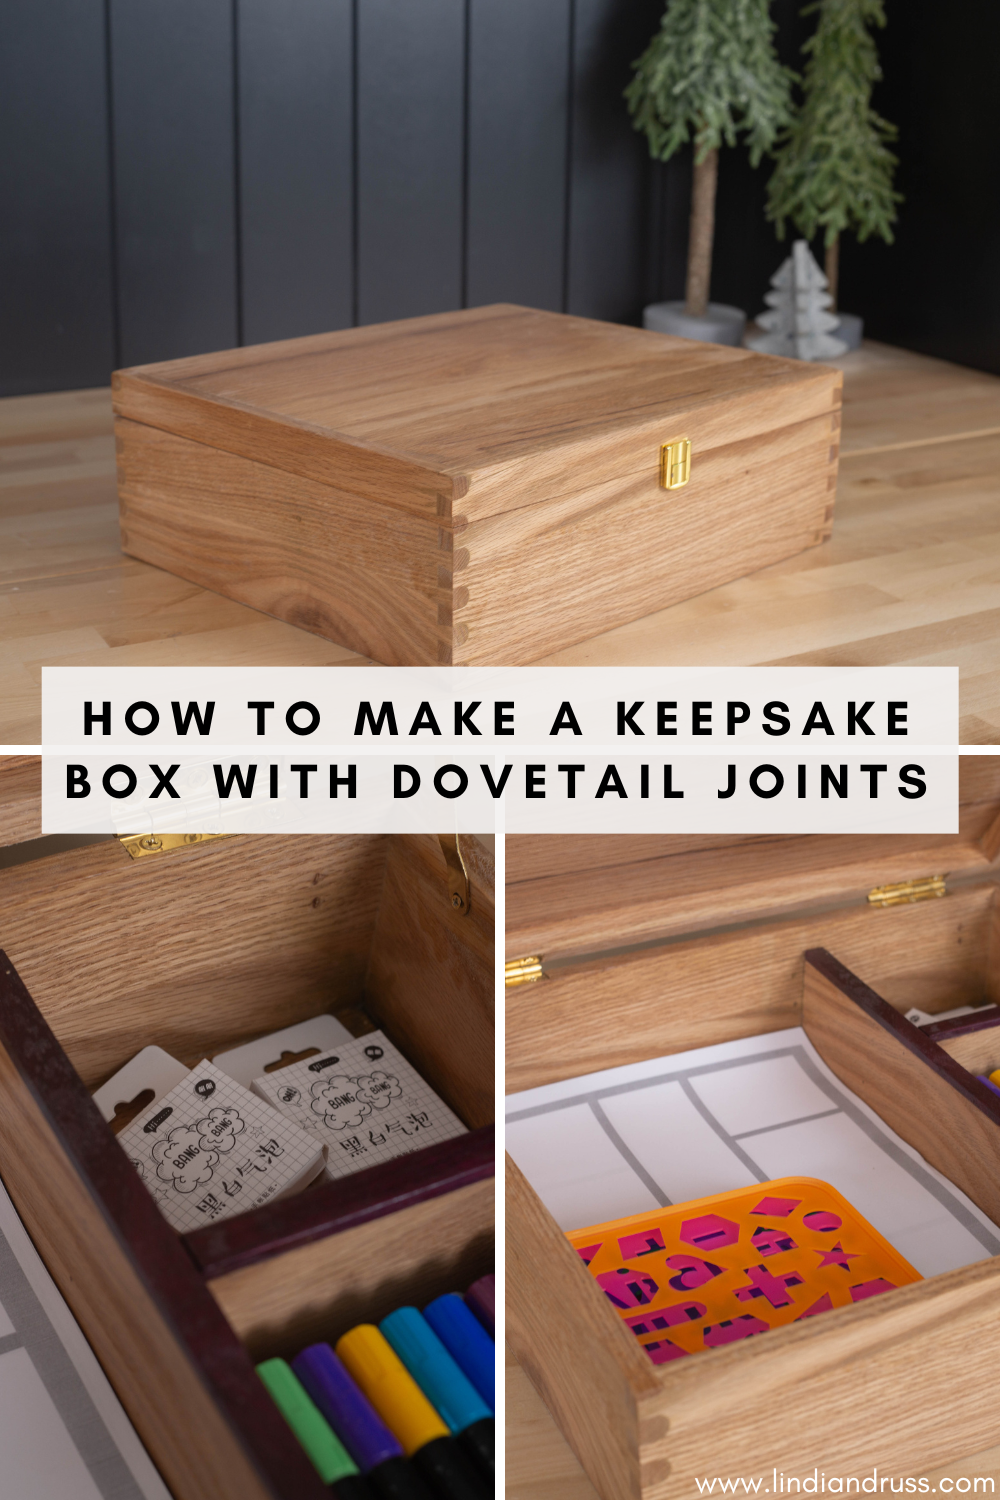
See our tutorial on How to make a Keepsake Box with Dovetail Joints that we gave to our kids for our Handmade Christmas gifts tradition.
*This post was sponsored by Wagner and may contain affiliate links. When you buy a product through one of our links, we get a commission at no cost to you! Thank you for supporting our blog so that we can continue to bring you posts like these. For more information, please see our disclosure page.*
If you know us you will know we love Christmas at our house. One of our many traditions that we do during Christmas is handmade gifts. This year we made some special keep sake boxes for our two daughters. To make the projects extra special we used scrap oak wood from one of Russ’s old high school wood working projects. We decided to use dovetail joints to heighten the finish and give it a really custom look high-end look.
Tools and Hardware we used:
- Wagner Paint Sprayer
- Dovetail Jig
- Chisel
- Router
- Guide Bushings
- 1/2″ Dovetail bit
- Calliper
- Hinge
- Latch
- Lid arms
Types of Dovetail Joints
Dovetail types:
You can read all about the different types of dovetails in this link here. For this post we will focus on a through dovetail joint or “English dovetail.”
Cutting Dovetails by Hand
You can add a traditional dovetail joint by hand. but because we were making multiple boxes and had access to a jig we decided to use the jig for this process
Cutting dovetails by hand is a lot more work and needs precise measurements and cuts to get everything to line up properly. There are lots of great articles online if you decide to try that method.
How to make a Keepsake Box with Dovetail Joints
Russ had found a General International 12″ dovetail jig (Model 40-010) at a auction a few years ago but never got around to using it. We set it up with the 1/2″ guide and a 1/2″ dovetail bit. The Woodstock D2796 12-Inch Dovetail Jig or King Canada K-2796 12″ Dovetail Jig are similar design. You can find the manufactures instruction for the General International Jig here.
Steps to using a Jig:
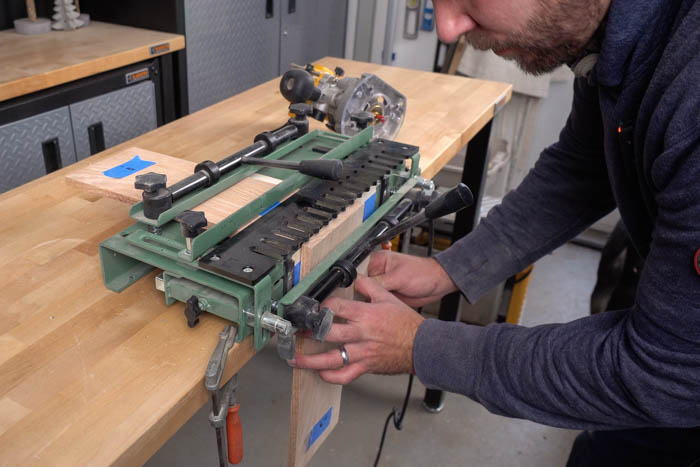
- set and clamp your jig to the table top
- determine the thickness of your material as you will need this measurement latter
- If making a box lay out all the pieces and label them as follows
- Set the black plastic guides. Adjust to the top piece (laying flat) is 1/2″ left of the piece sitting vertically. This offsets your joints to they lock together. This can be adjusted slightly based on your material width. We highly recommend using a scrap pieces of wood with the same dimensions for your first cut.
- Set the back fence with the following equation: (Stock thickness x 2) + (Router base radius/2) – (Router bit radius) = distance to set fence from front edge of finger template. Our equation looked like this: (1/2″ x 2) +(4 1/8 ÷ 2) – (1/2 ÷ 2) = 2 13/16″. This will give you the distance we set the back fence from the front of the finger template jig.
- We used some 1/8″ scrap wood to place under our 1/2″ thick material. This is so we didn’t have issues with the router bit hitting the jig
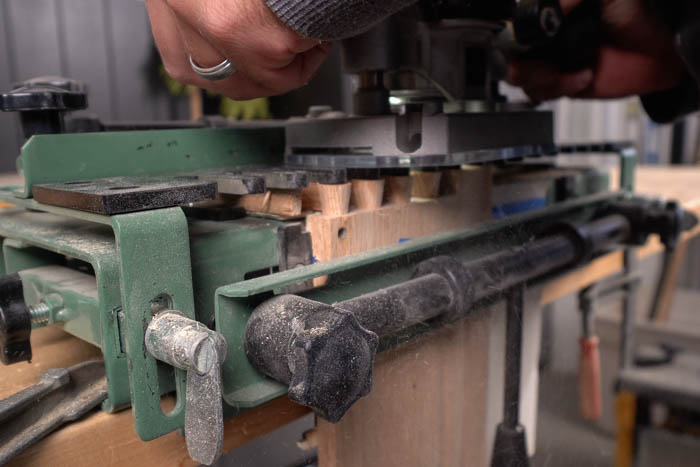
- Set your router bit to a depth of 7/8″. This may need to be adjusted depending on if you are cutting a through dovetail or a half blind dovetail.
- Do a practise cut. Look at your piece you may need to adjust the jig if required
Jig Trouble shooting
A calliper is a great tool to help get exact measurements for the best dovetail joint.
- If your edges of the two pieces don’t align and sit flush your edge guides are not set correctly. You need to be adjusted to so the top piece sits 1/2″ left of the bottom piece.
- If you dovetail is too tight reduce the depth of the bit slightly (distance from bottom of router base to end of bit)
- If your dovetail is too loose increase the depth of the router bit slightly (distance from bottom of router base to end of bit)
- if the pins/fingers over extend (stick out) pass the end of the box your cut is too shallow. Adjust the fence (increasing the distance) the amount the pins/fingers extend past the box.
- if the pins/fingers are not flush and sit inwards (leaving a gap/hole) or the joint is visible in the inside edge your cut is too deep. Adjust the fence (increasing the distance) the amount the pins/fingers extend past the box.
Keepsake Box with Dovetail Joints

Once the jig gets your desired cut with the practise piece, grab your pieces to make your box. The pieces will need to be cut to width/height/length ahead of time. Mark and labeled each corresponding set so you don’t mix up the pieces while cutting all your joints. You can decide how you want to layout all your joints. Either alternating or keeping all the ends to the same sides.
Assembly
Before we started assembly of the keepsake box with dovetail joints we gave everything a light sanding first.
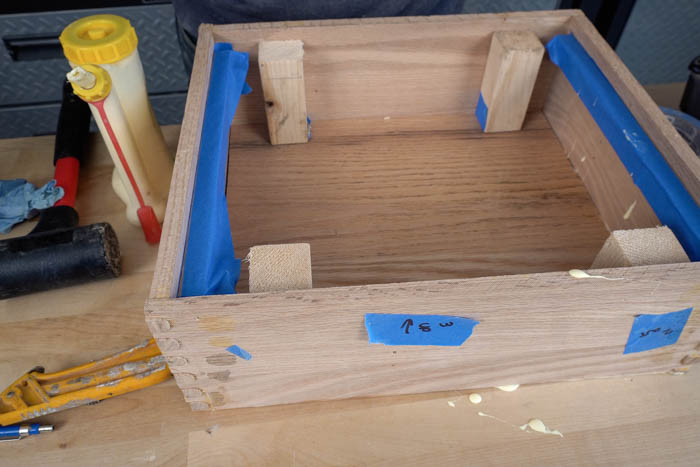
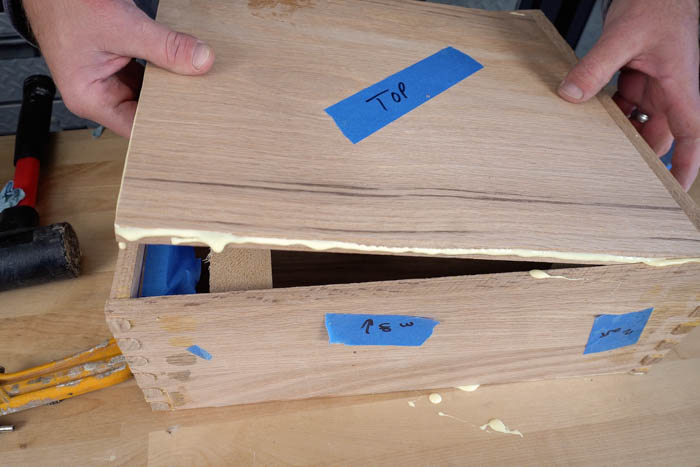
We matched all the corners together and glue the perimeter first. With the glue dried we fitted a top and bottom to the box and glued them in place one at a time. Now you will have a completely sealed box.

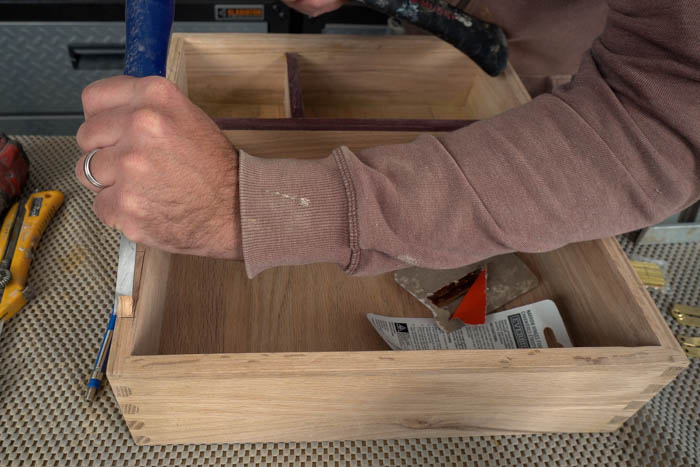
Once all the glue sets give the entire exterior of the box another sanding.


Cut the lid of the box, we used our table saw. You may want to mark the corresponding side of the lid to the box so the wood grain matches when you go to attach the lid.
Customizing your Keepsake Box
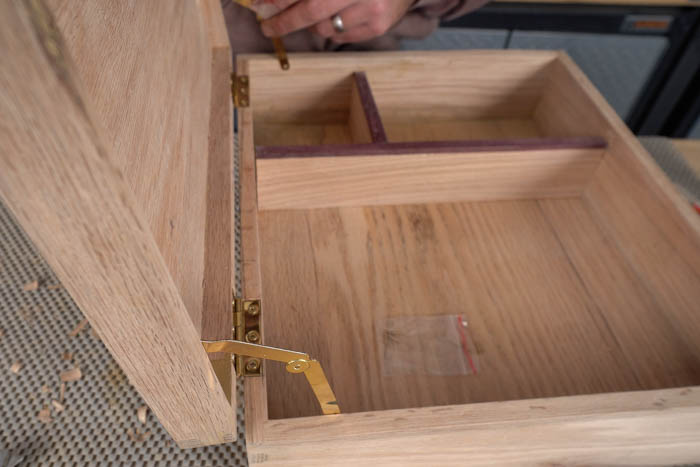
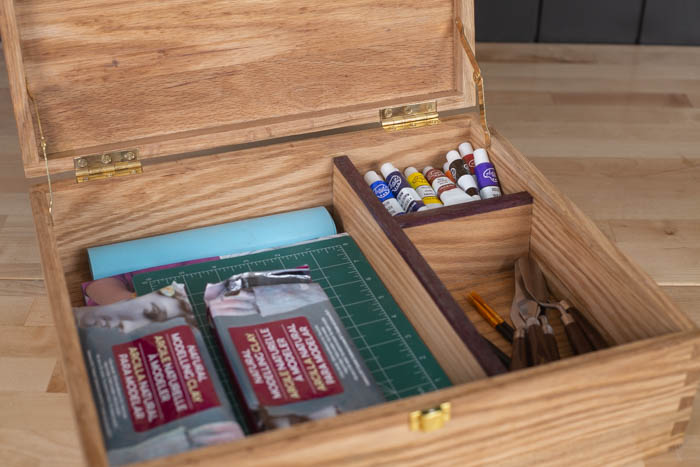
You can add dividers or trays to you box depending on what you intent to use it for. We wanted our boxes to be able to hold pens, and a 8 1/2 x 11 size book so we build 3 compartments in the box. We also added some purple heart hard wood to the top of the box dividers.


Adding some hardwood accents can really set a project apart. Woods like Purple Heart, Walnut, and Maple can look really good when finished correctly.
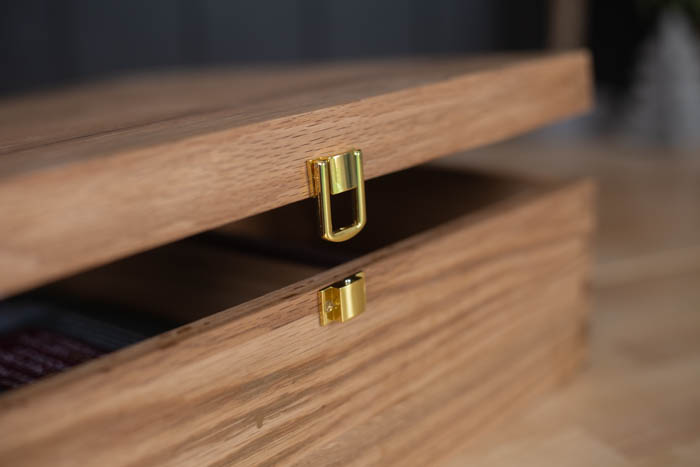
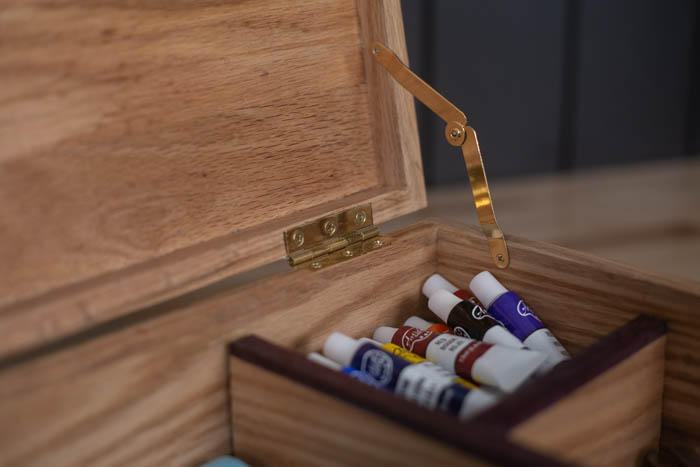
Adding some nice hardware can also really set your project apart. We got a brass latch, hinge, and arms and installed them on the box.


Adding Finish

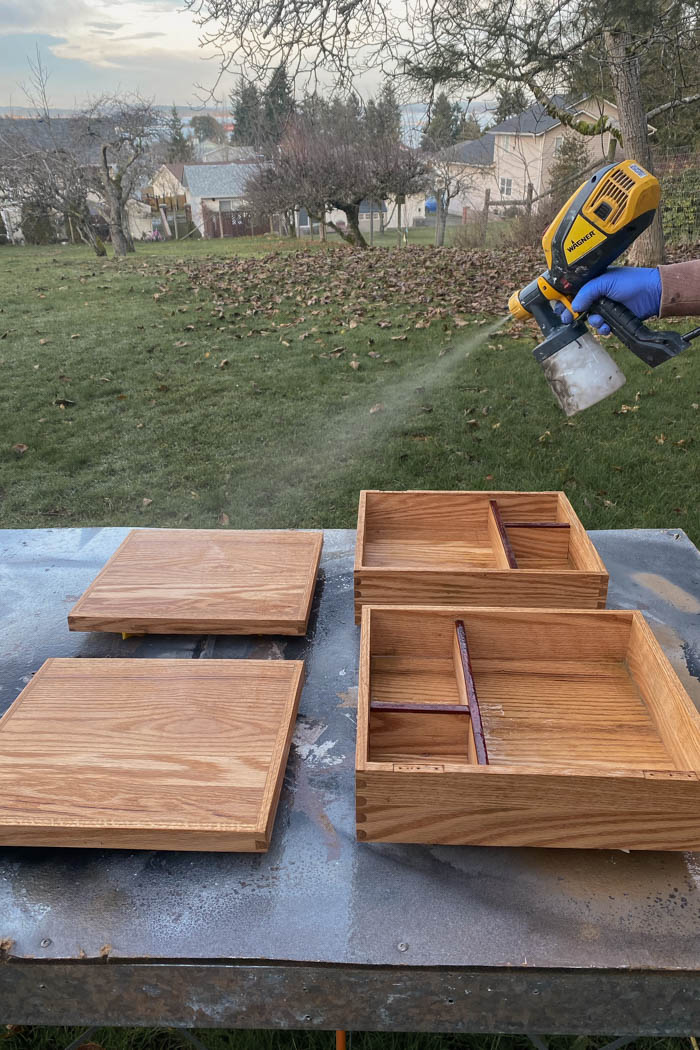
We used our Wagner Flexio 3500 sprayer to add all the finishes. This is our go-to sprayer as it is easy to use, easy to clean, and can spray paints, primers, stain, top coats, etc. Its great for DIYs and gives a really nice clean finish.
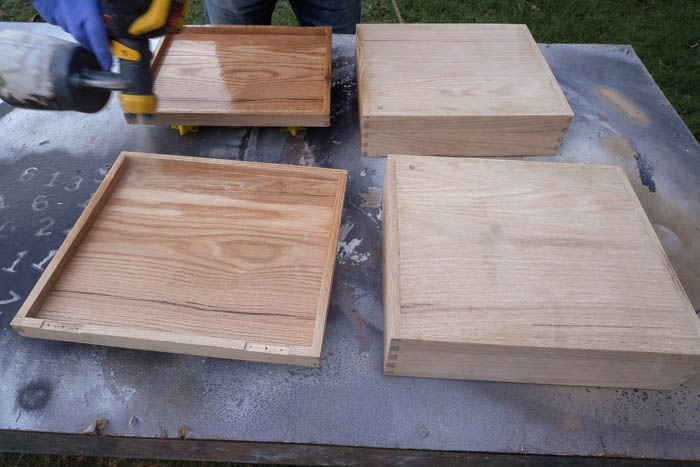
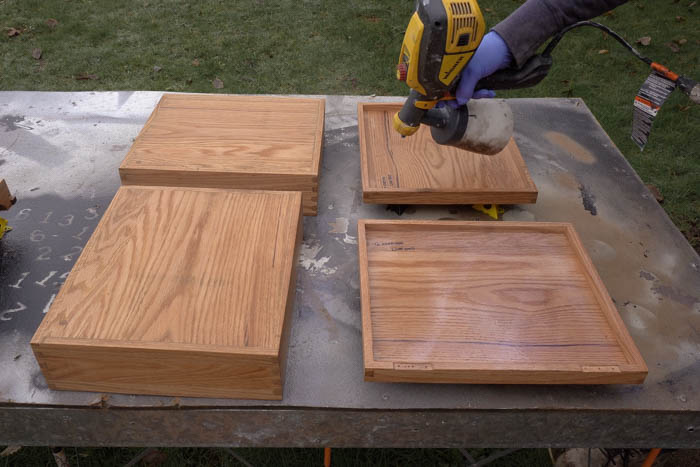
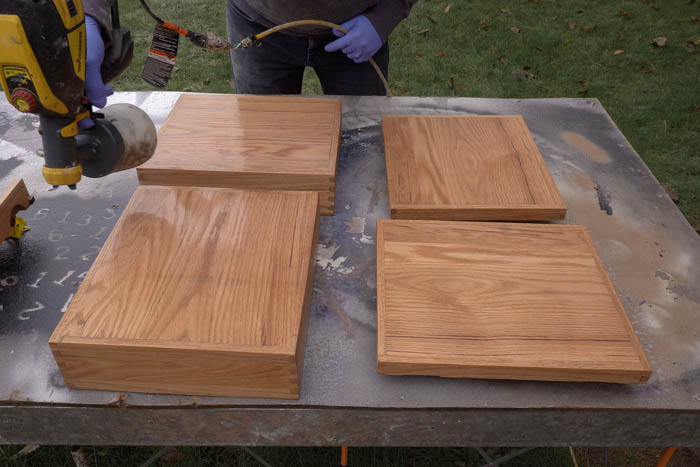
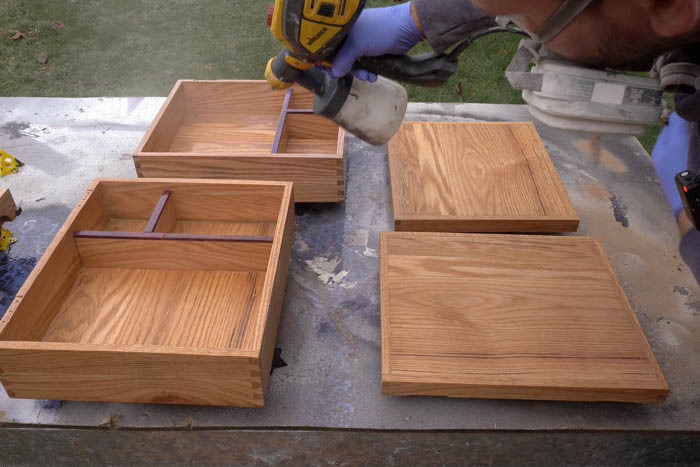
We used a natural stain on the boxes and finished them with a polycrylic matt clear finish to protect and seal the boxes. The Flexio 3500 made quick work of applying the stain and finish and gave a really professional and high quality look once it dried.
Completed Boxes
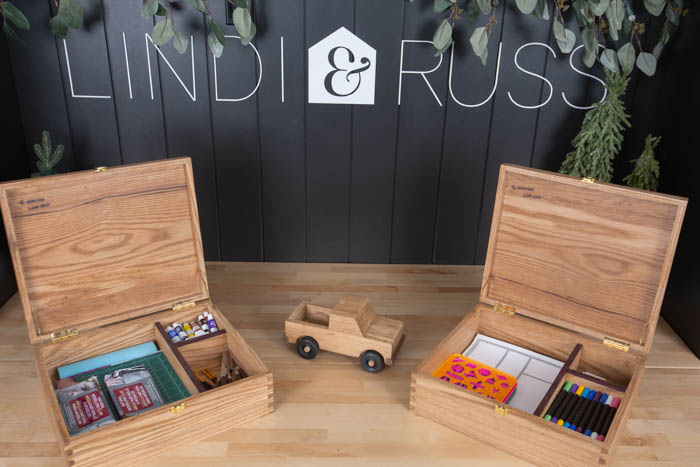
We couldn’t be happier with how these turned out! Our kids can use these boxes for storing all their crafting items or special keep sakes as they get older.


You can see the entire box get built in the video below. We are so happy with how the boxes turned out and can’t wait to come up with next years project!
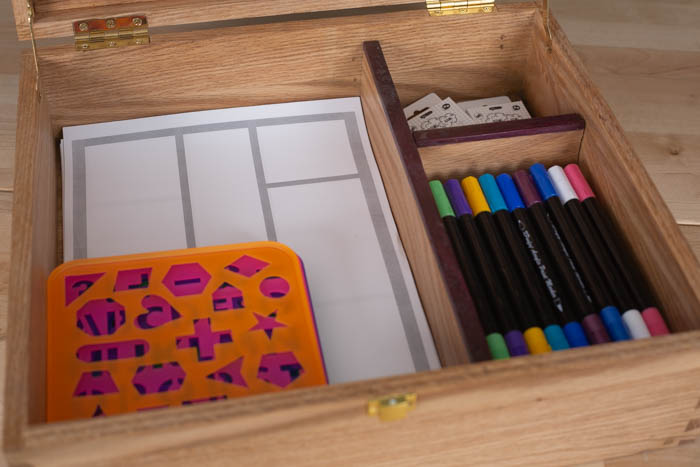

You can use the boxes for various storage. Due to our kids age we made one “Comic Project Box” and one a “Clay Project Box”.

But we are pretty sure these will turn into a special keep sake box in their future to hold special items or even jewelry if they want! See more details in the video below (as well as another bonus project)!
Gifts we made each other!
Check out the Gifts We made each other below