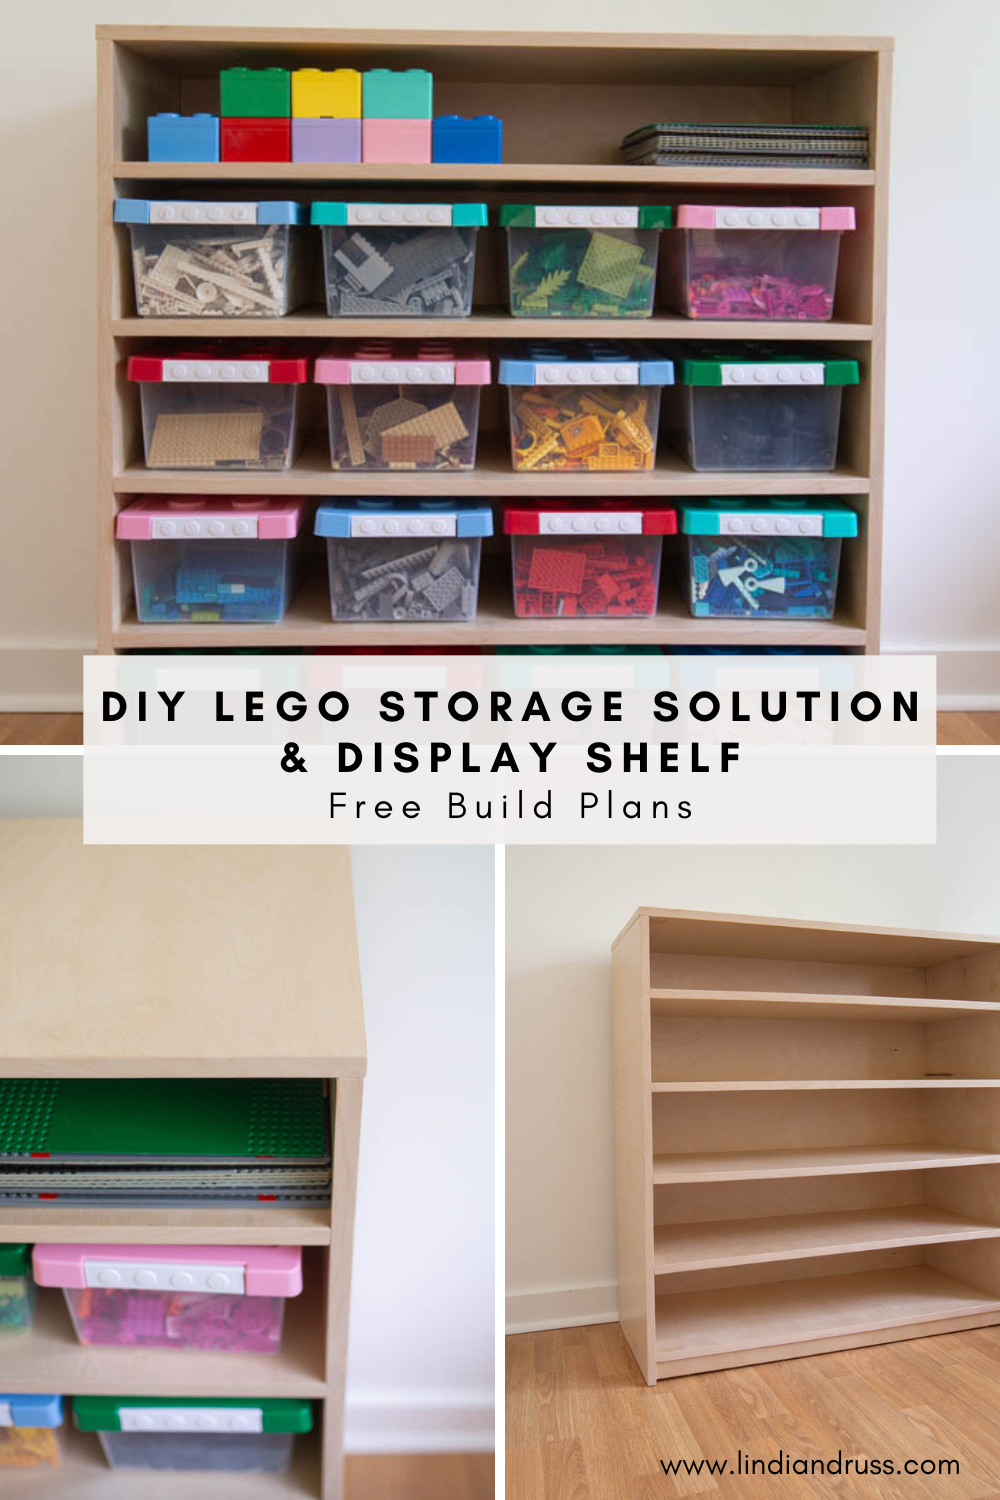
Easy DIY Lego Storage Solution & Display Shelf – Free Build Plans! Download the free build plans and organize your kids toy room!
*This post is sponsored by Kreg Tools, and may contain affiliate links. As always, opinions are 100% my own. For more information, please see my disclosure page.*
Our kids’ Lego and Lego creations were continually being spread all over the floor, living room, and around the house. We needed a better solution for how they stored and organized all their Lego. The kids had their own Lego table we had built for them before but it had limited storage. We came up with this Easy DIY Lego Storage Solution & Display Shelf – Free Build Plans to deal with all the Lego around our home.
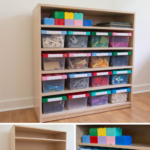
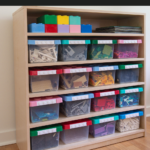
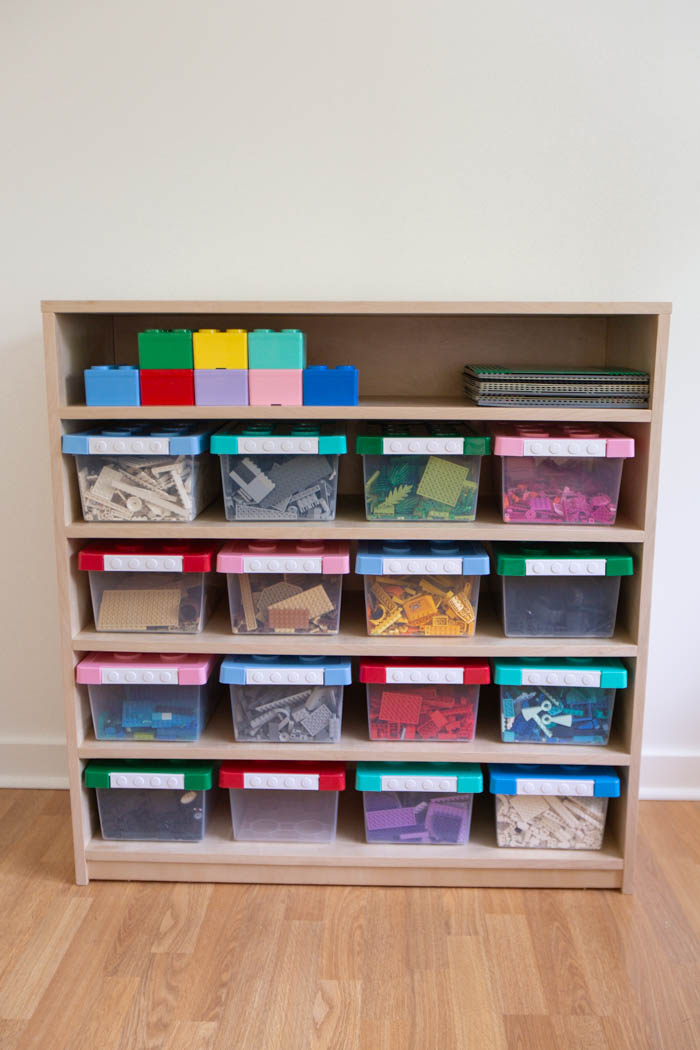
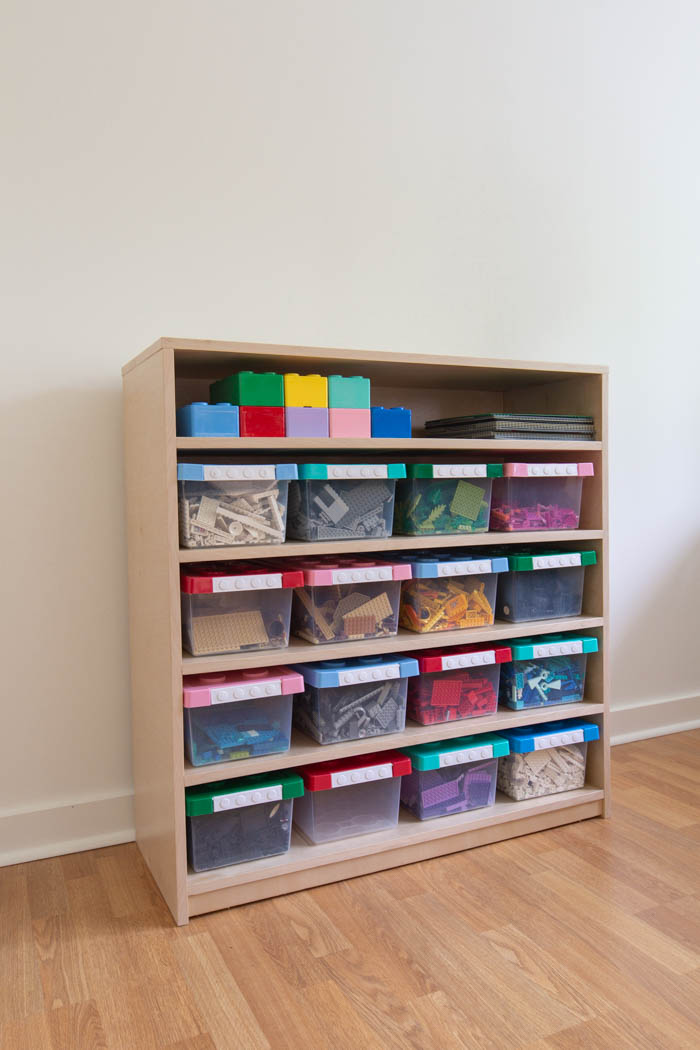
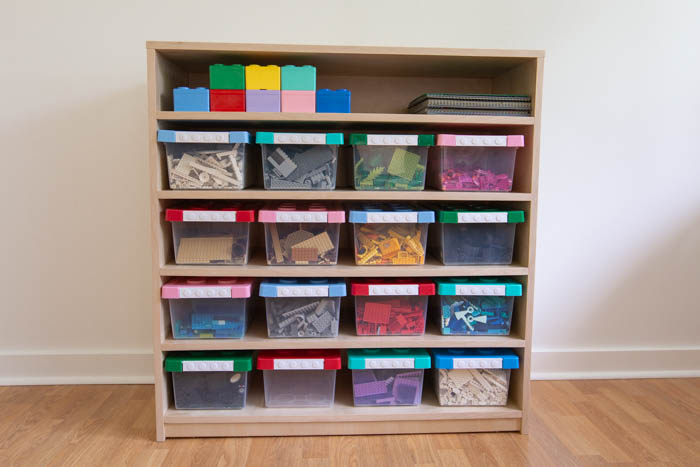
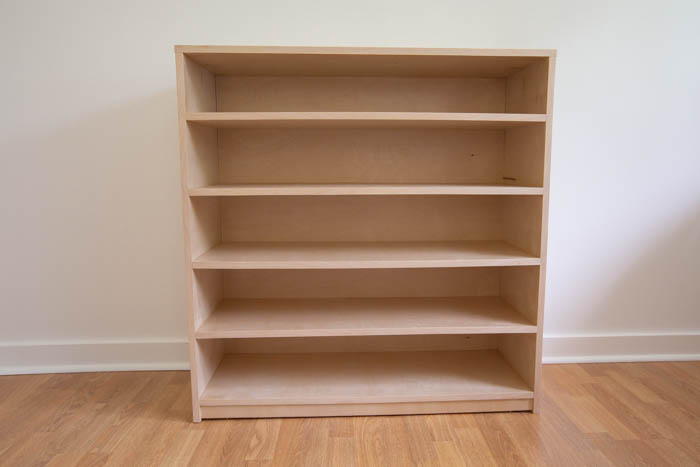
We found some great Lego storage containers and decided to make a custom open shelving unit to fit these storage bins and our kids needs. The shelf could hold a total of 16 storage bins and allowed for easy access for younger children to use.
They could store Legos based on colour and type with the different clear plastic bins and gave plenty of space and organization for all their Lego blocks.
We quickly drew up the shelf to fit the bits and space we wanted to place it. We than headed to the hardware store to grab a couple sheets of plywood and started building our shelf.
Build Your Own DIY Lego Storage Solution and Display Shelf
Shelf design
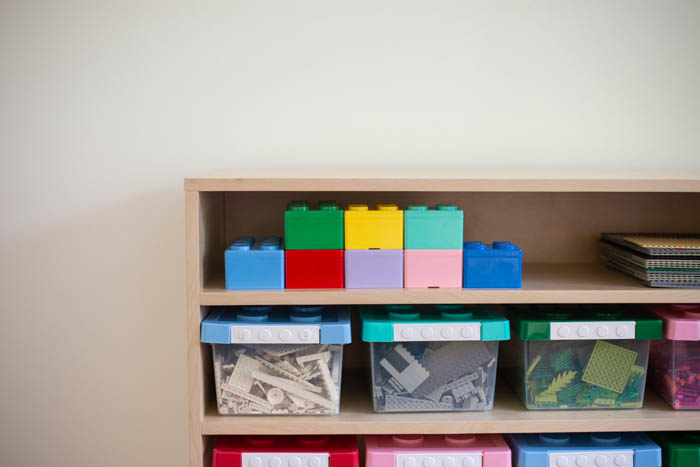
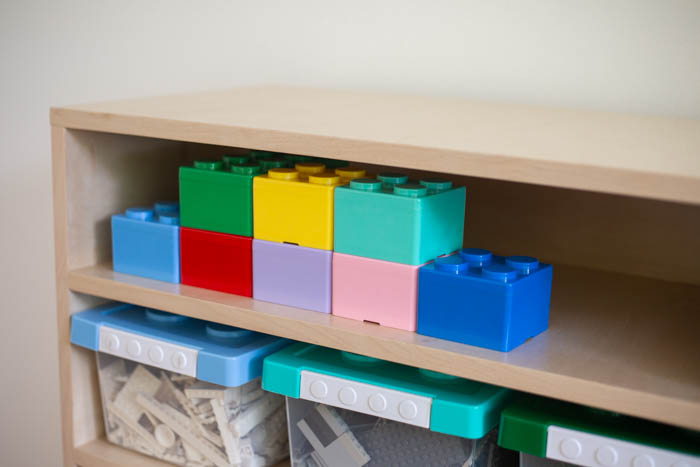
We designed the shelf to have different sizes of openings. The top shelve was for our kids to store smaller items like Lego minifigures, instruction manuals, Lego baseplates, and any other small pieces.
We didn’t want any storage drawers as we felt a drawer unit wouldn’t be as easy to use as being able to pull a large bin off the shelf instead. The other storage shelves had large open spaces to hold the clear plastic bins.
The design we came up with had lots of great storage solutions for what we need and fit perfectly in our children’s room. The top of the shelving unit could be used to show off any Lego sets, Lego Buildings, or store any unfinished current projects. The whole thing was a simple solution to our Lego organization needs.
Materials
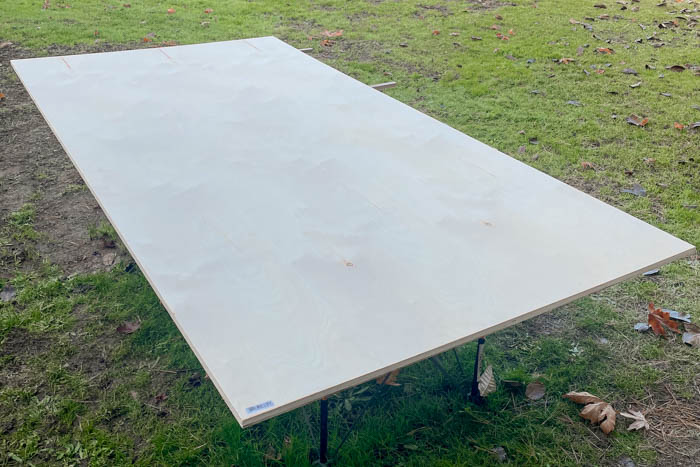
We used 3/4″ thick birch plywood (good on both sides) as this is what was available at our local hardware store. Based on being a good price (around $60 a sheet) we thought this was a good option for our shelf.
Depending on what is available locally you can modify your shelf’s design and material type to best suite your needs.
- Two sheets of 4’x8′ 3/4″ thick good two side plywood
- Edge Banding
- Wood Glue
- 1 1/4″ Pocket Hole Screws
- 2″ wood screws
- Wood Plugs
- Painter’s tape
- Natural Wood Filler
- Clear Finish
- Clear Plastic Storage Boxes
Tools
- Kreg ACS2000 Saw & Track Kit
- Kreg 520 Pro Pocket Hole Jig
- Kreg Multi-Mark Ruler
- Drill
- Impact
- Orbital Sander
- Edge Banding Cutter
- Detail Sanding Block
- Heat Gun
- Finish Sprayer or brush/roller
Building Instructions:
Be sure to check out Kreg Tools Project and Plans to download a free copy of the PDF plans. Kreg’s site has lots of great build plans you can download and follow step-by-step!
Step 1 – Cutting
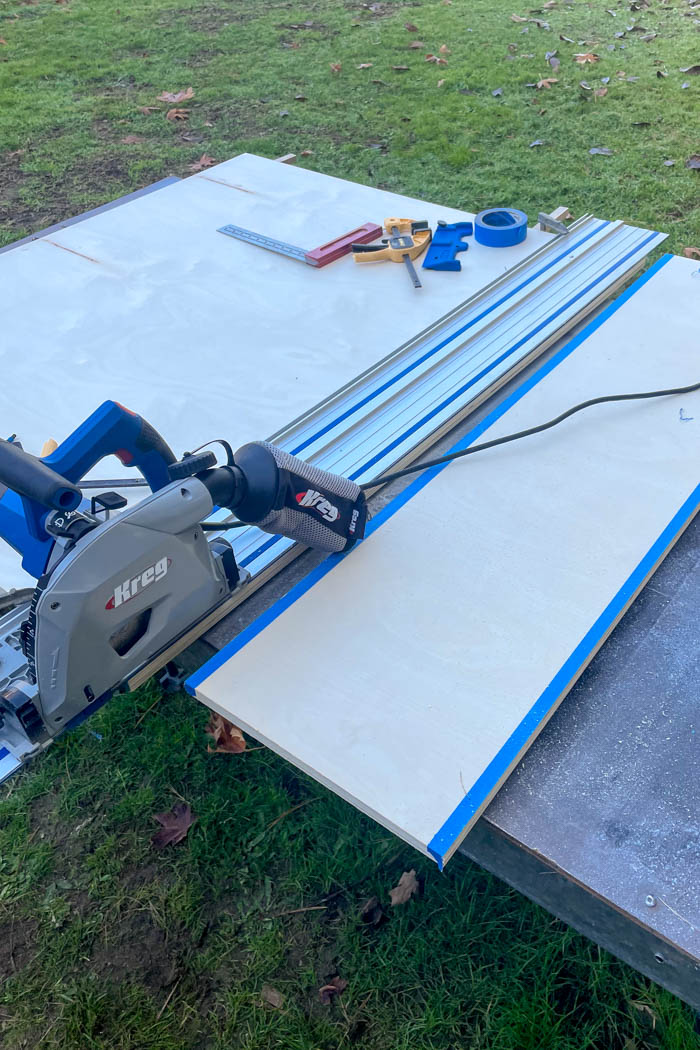
The best way we found to cut large pieces of plywood down to size is to use a track saw. Kreg’s track saw is a great option and we used it to cut all the pieces to width for this project. The track saw allows you to get accurate cuts easily without having to continually move the heavy and awkward sheet of plywood around. You can used painter’s tape along the cuts to minimize tear out.

Be sure to check for square as you go, taking diagonal measurements of each piece. Each diagonal measurement for opposite point to opposite point should match each other if the piece is square.
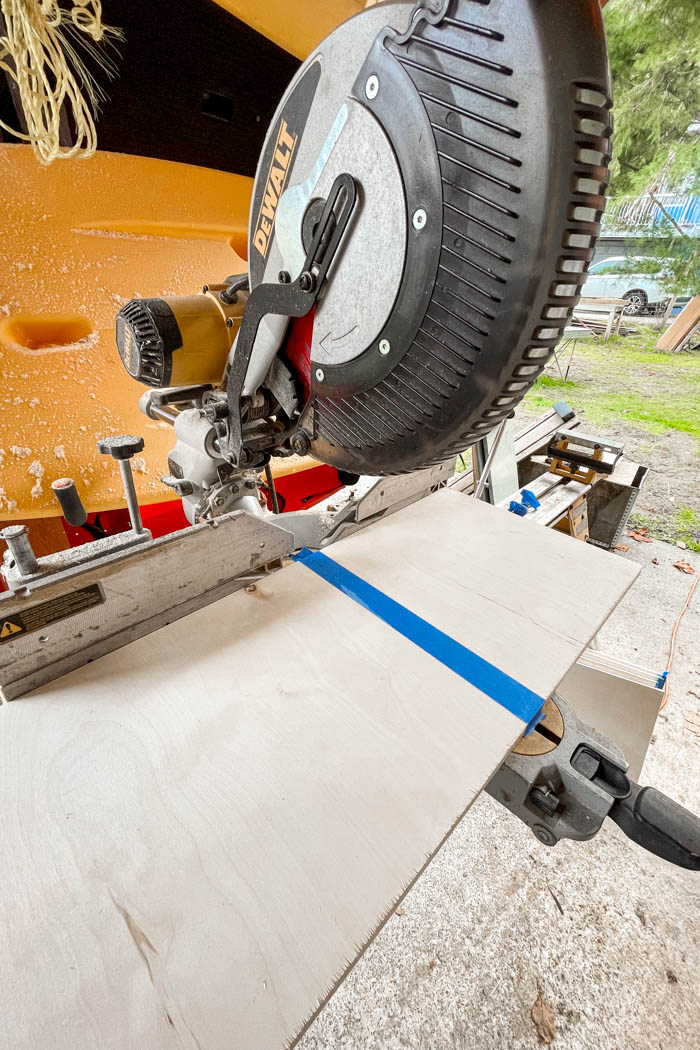
A mitre saw was used to cut the pieces to length. Again we used painter’s tape along the cut to minimize tear out. Not required but if you plan to stain or use a clear coat finish, try to think of the wood grain to try and match the direction of the grain as best you can for when you assemble the piece.
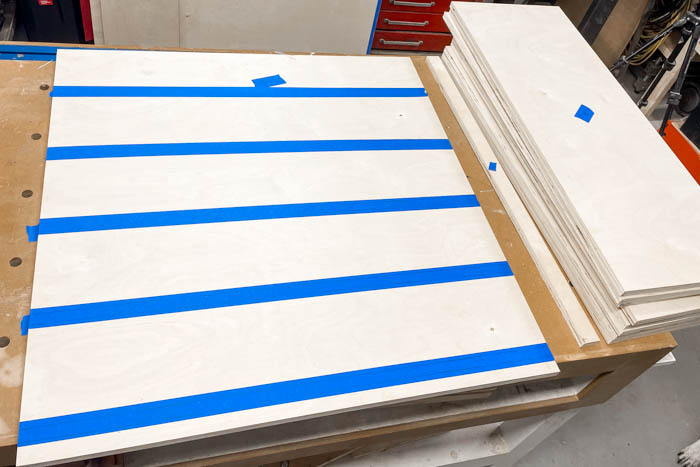
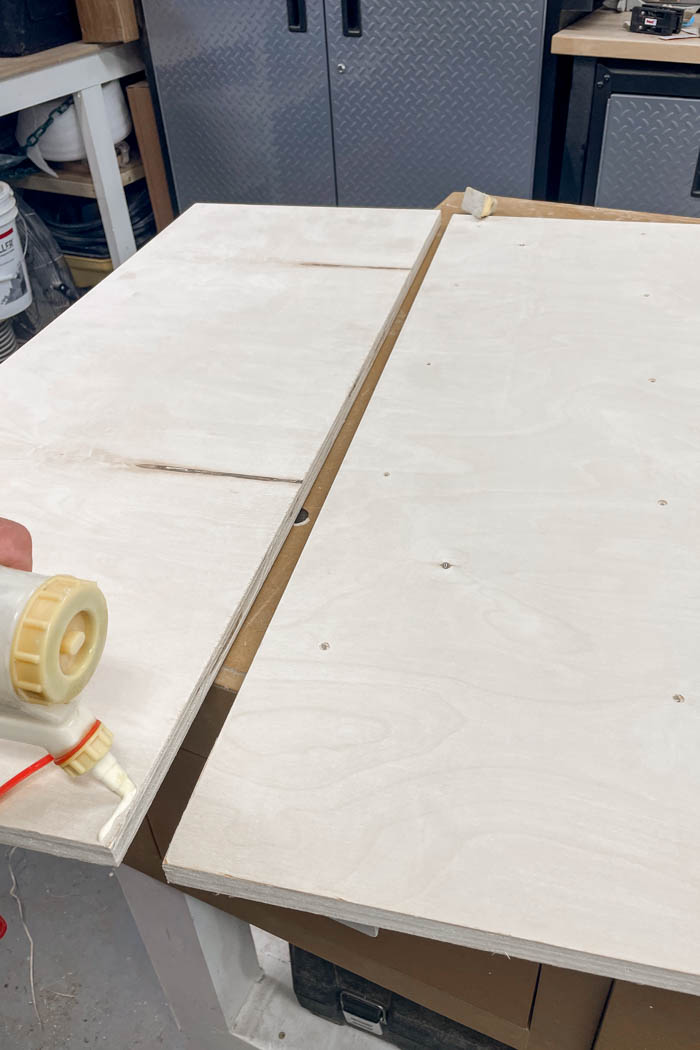
Step 2 – Pocket Holes
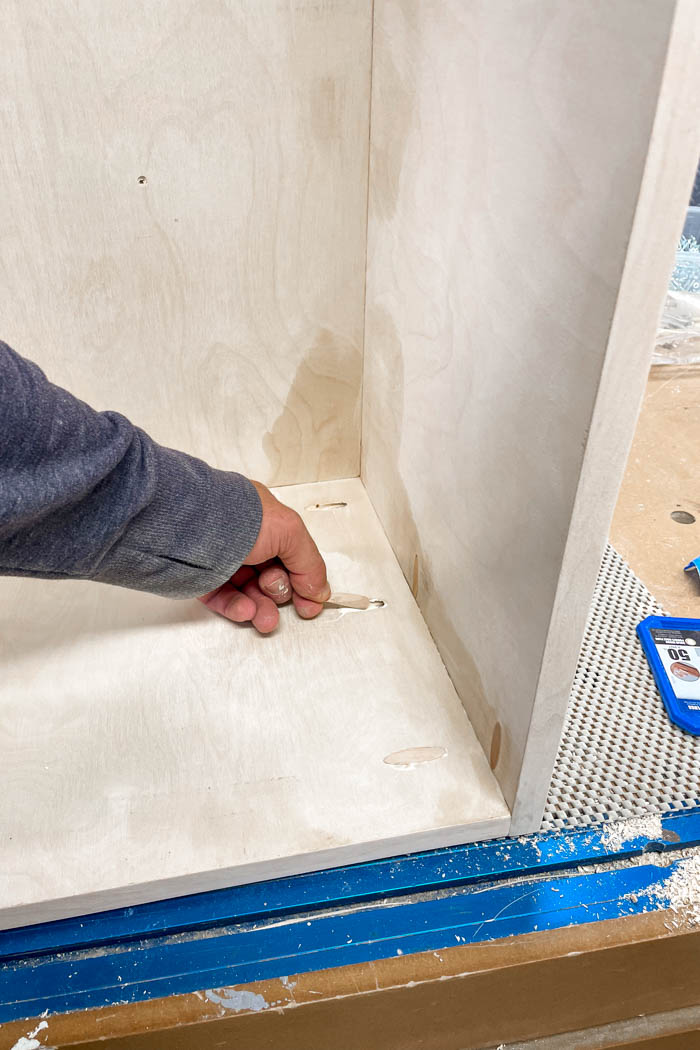
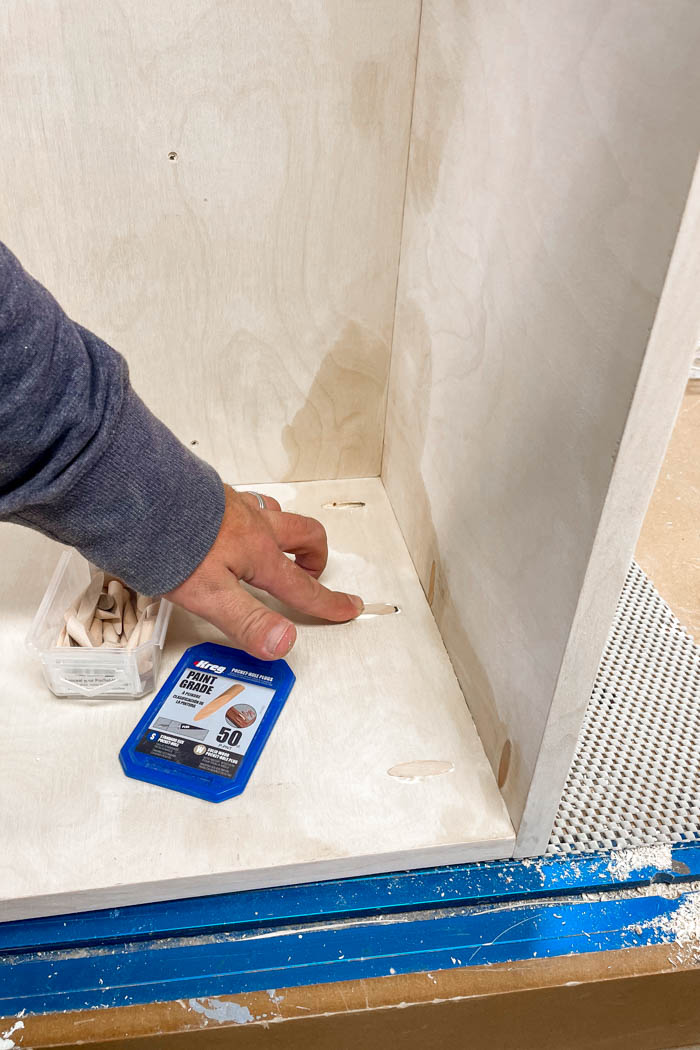
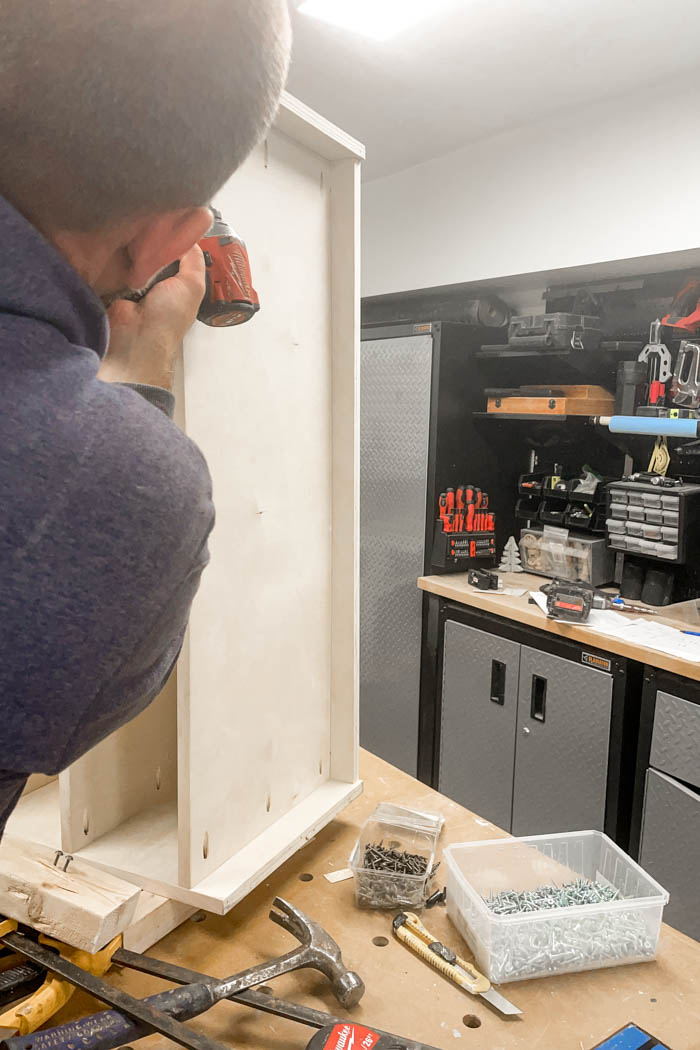
We marked out all the holes using our Kreg Multi-Mark Ruler and tape measurer as per the plans. You can use painter’s tape and mark on it if you have to make a bunch of marks to prevent extra sanding in the next step. Pocket holes are a great way to get a strong and secure connection between pieces. You can also use Kreg’s wood plugs to dill the hole to get a seamless look.


Pocket holes were drilled using our Kreg 520 and 720 Pro Pocket hole jigs. All the pilot holes were drilled along the back of the shelf to secure the shelfs during the assembly steps.

Step 3 – Edge Banding
We added 3/4″ edge banding to all the exposed edges all the sides of the shelf. We used a heat gun to apply the banding and a edge banding cutter to remove the excess. You can use a small sanding block to clean up all the edges to get a nice clean finish.
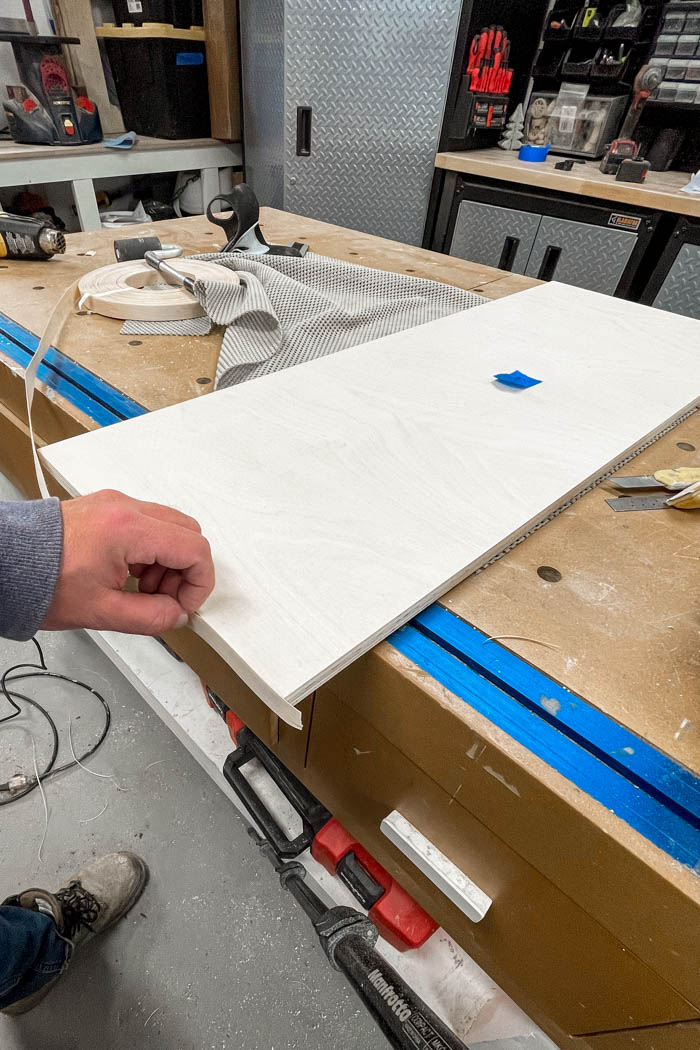
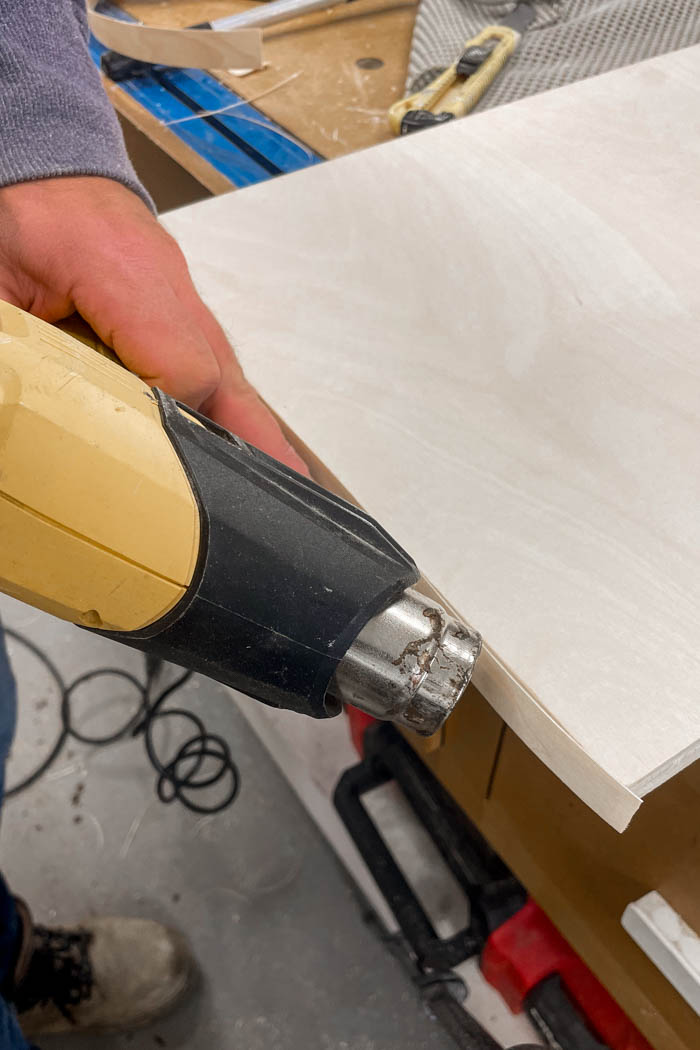
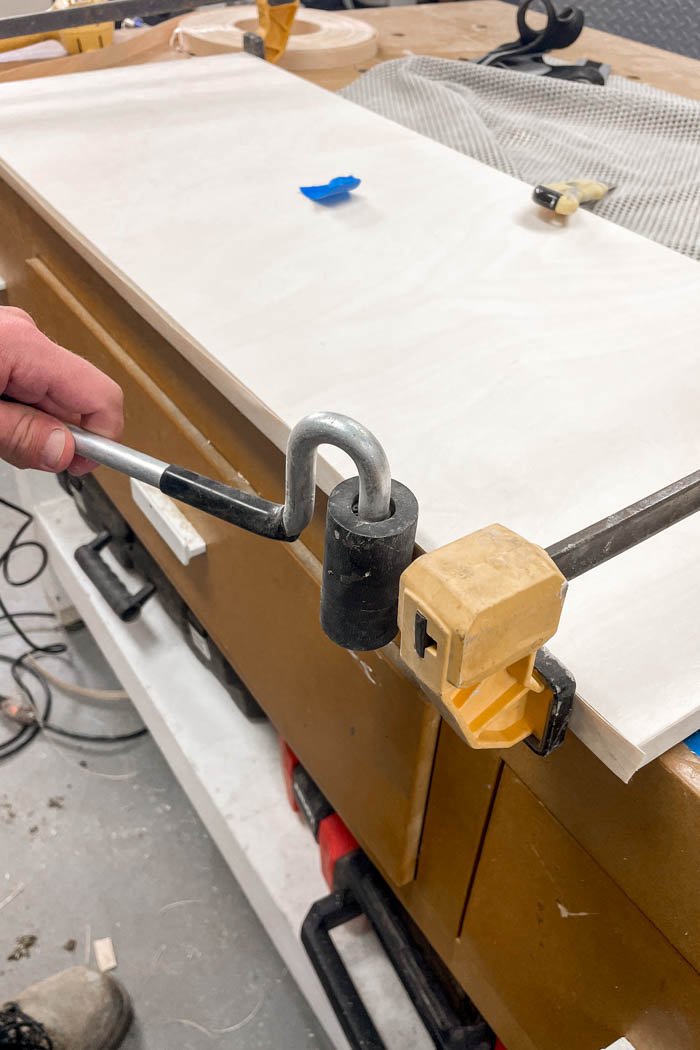
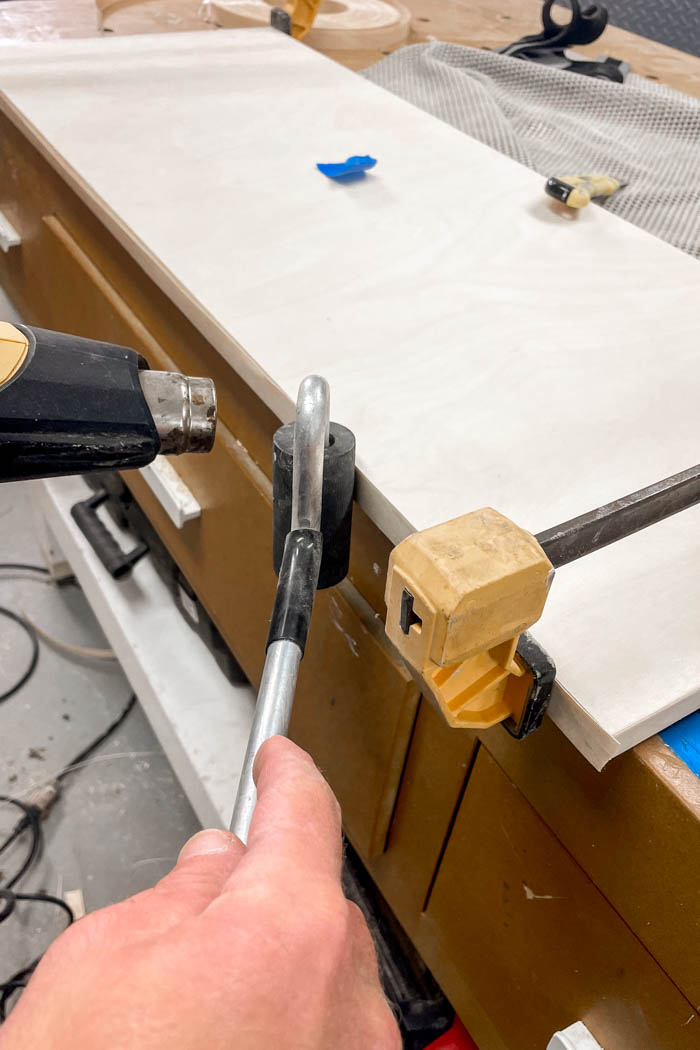

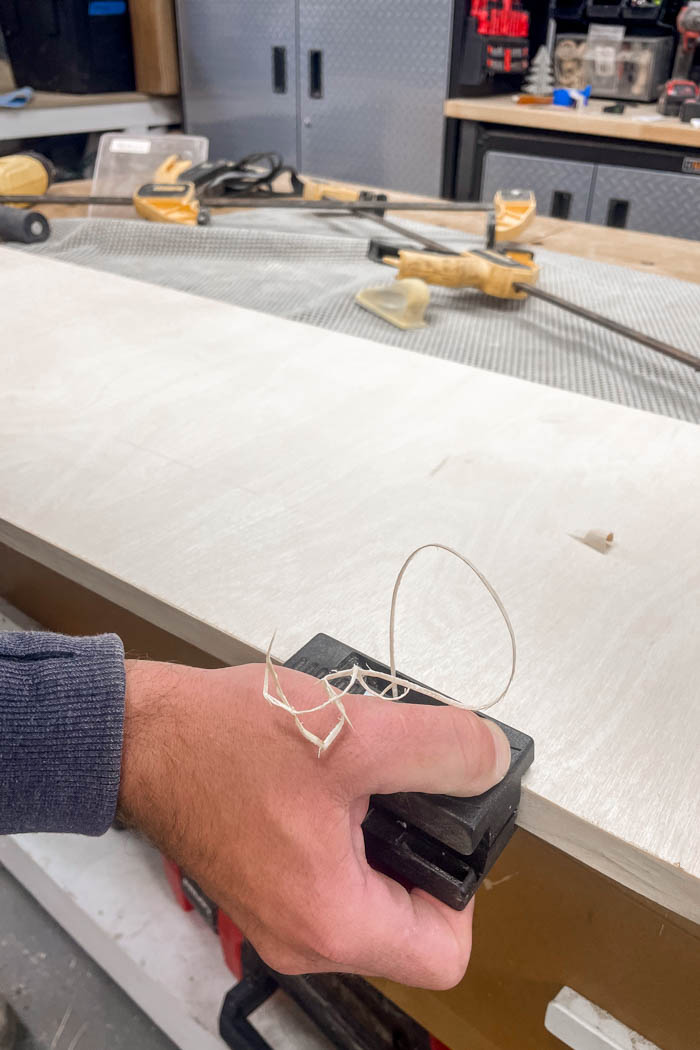
Edge banding allows you to hide the edge of the plywood and get a nice clean finish.
Step 4 – Sanding
Lightly sand the entire piece, be careful not to sand through the veneer of the plywood. We sanded the entire shelf with a 220 grit sand paper and our orbital sander on a low speed setting.
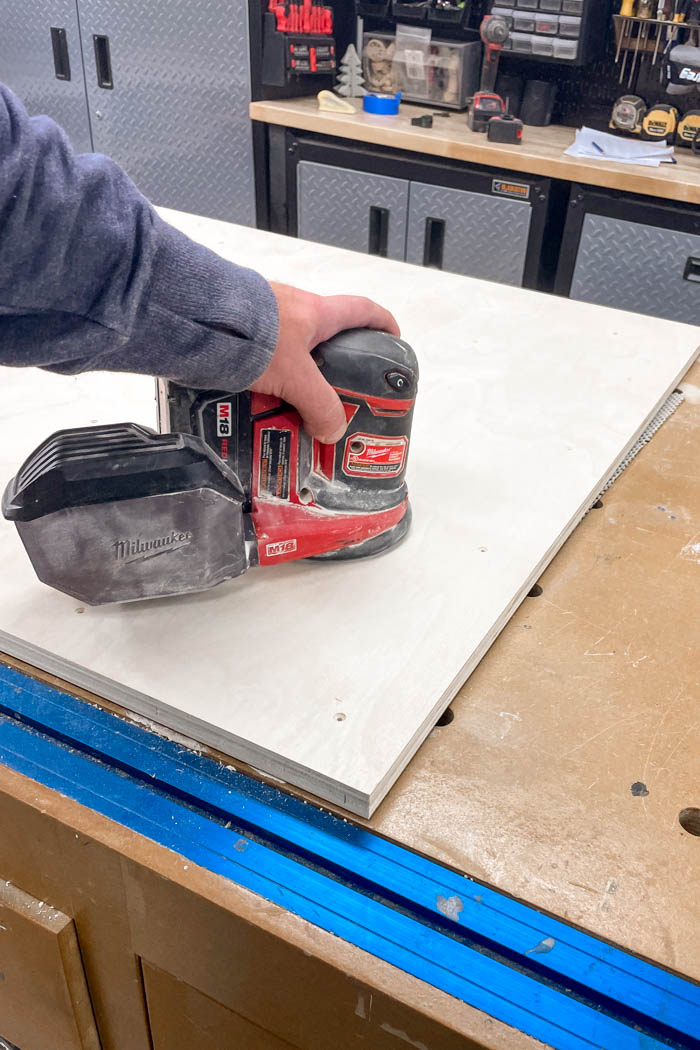
If you find any blemishes, defects, or tear out from cutting you can use some wood filler to touch up these areas. Apply, let dry, and give another light sand until smooth.
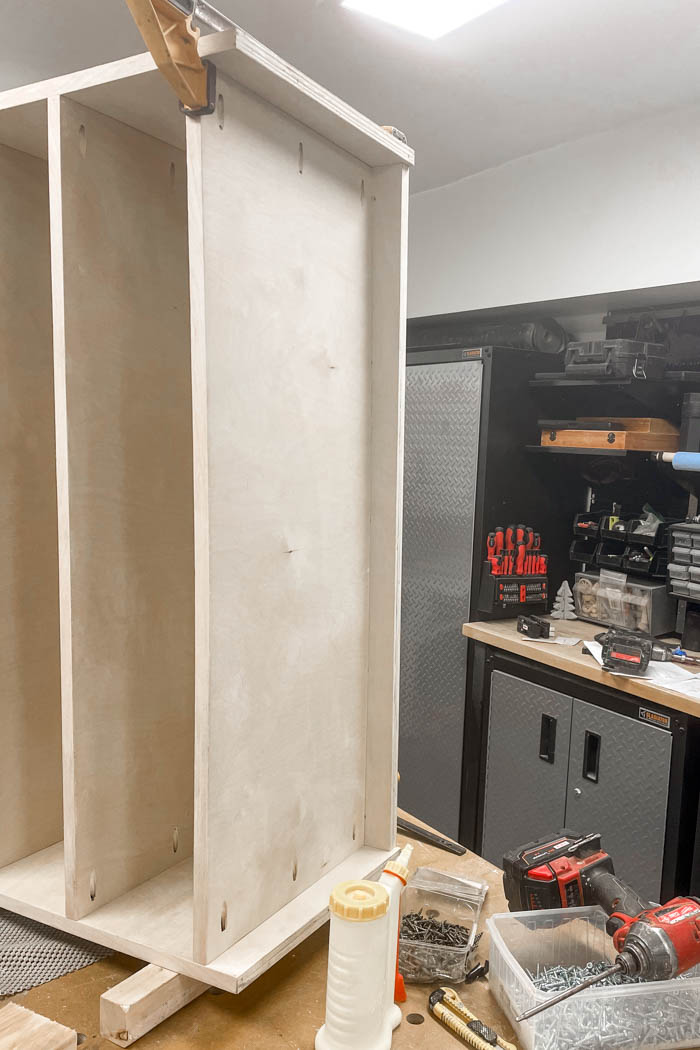
Step 5 – Assembly
We started assembly by attaching the sides to the back. The sides were glued and secured into place with an impact driver and 1 1/4″ pocket hole screws. When apply glue be sure to remove any excess glue once the pieces are secured together. Use a damp cloth or rag to remove the glue. This will help give you a really nice finish and look when you go to apply you desired finish (stain, paint, clear coat, etc.).
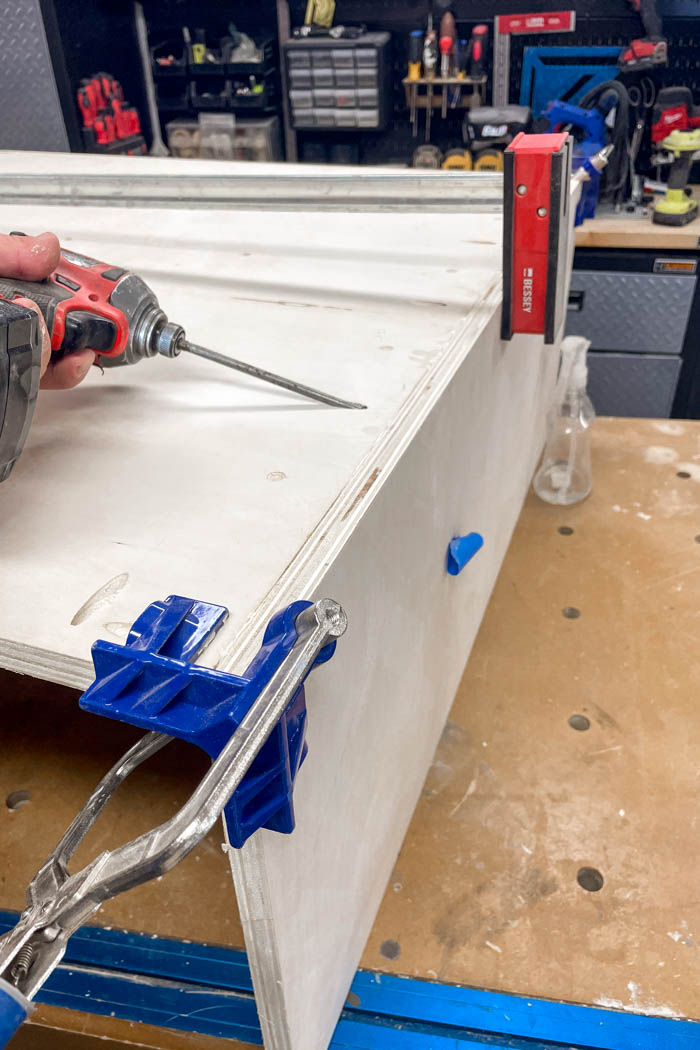
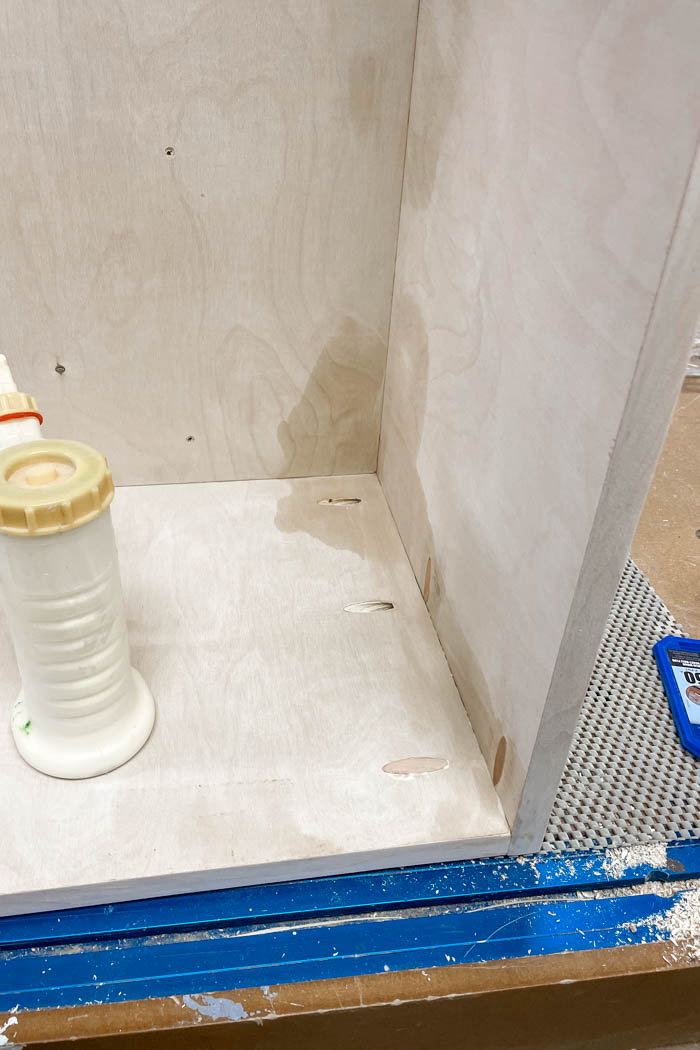
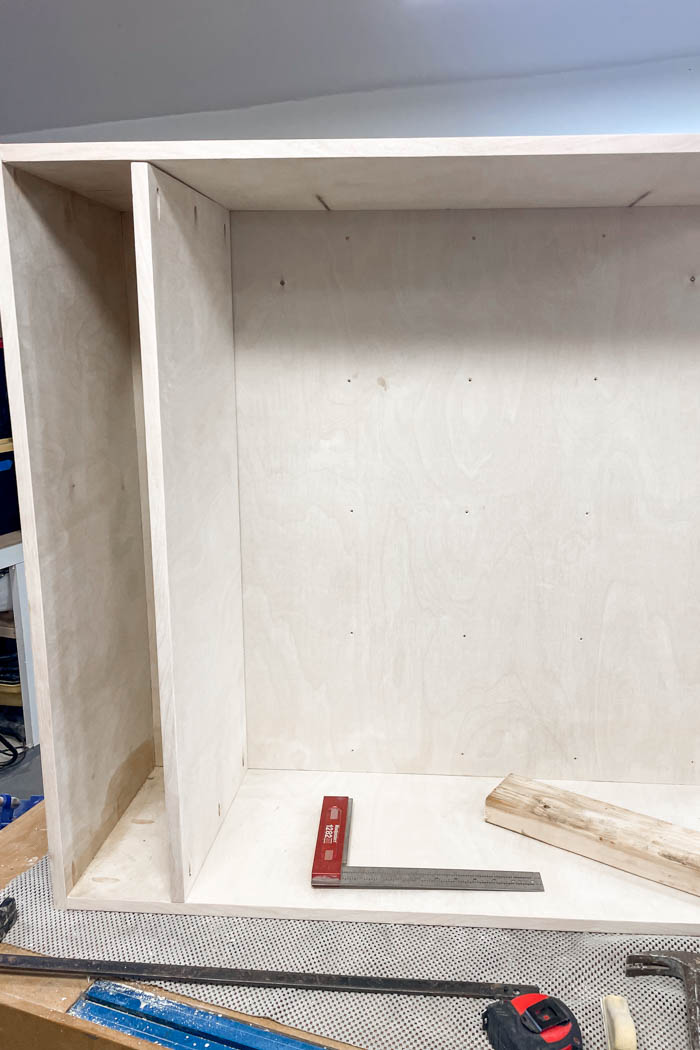
You can use Kreg’s wood plugs to fill in any visible holes to get a nice smooth finish. Once the sides were secured we added the top piece to the shelf.
Next was the top shelf working our way towards the bottom. We built a spacer block to ensure all the shelfs were set to the spacing noted on the plans and to keep everything nicely aligned and square.
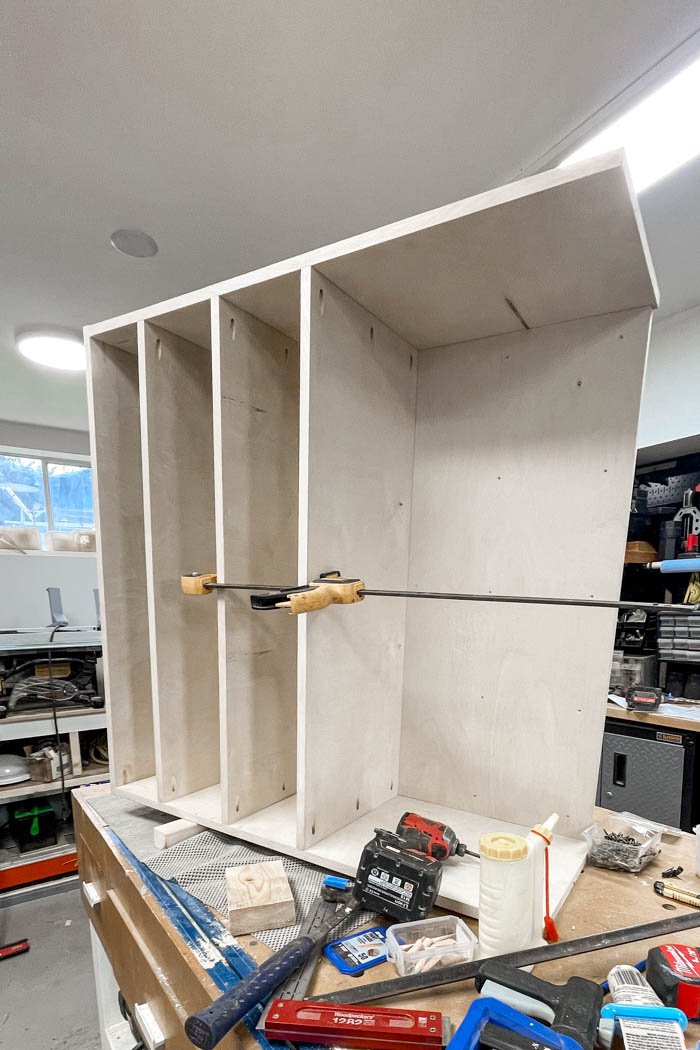


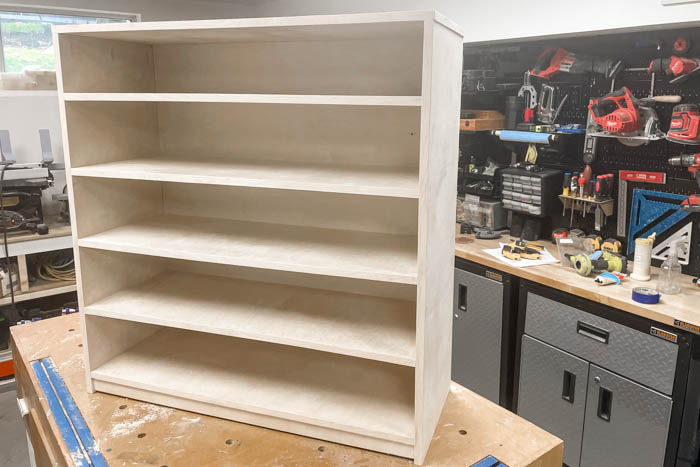
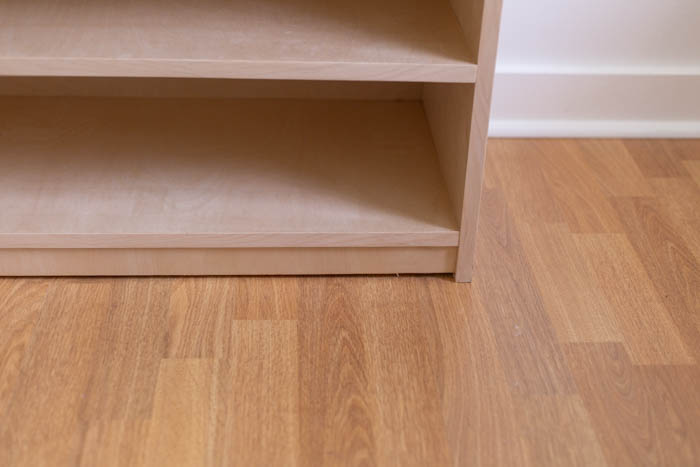
The final piece to be installed was the toe kick.
Step 6 – Finishing
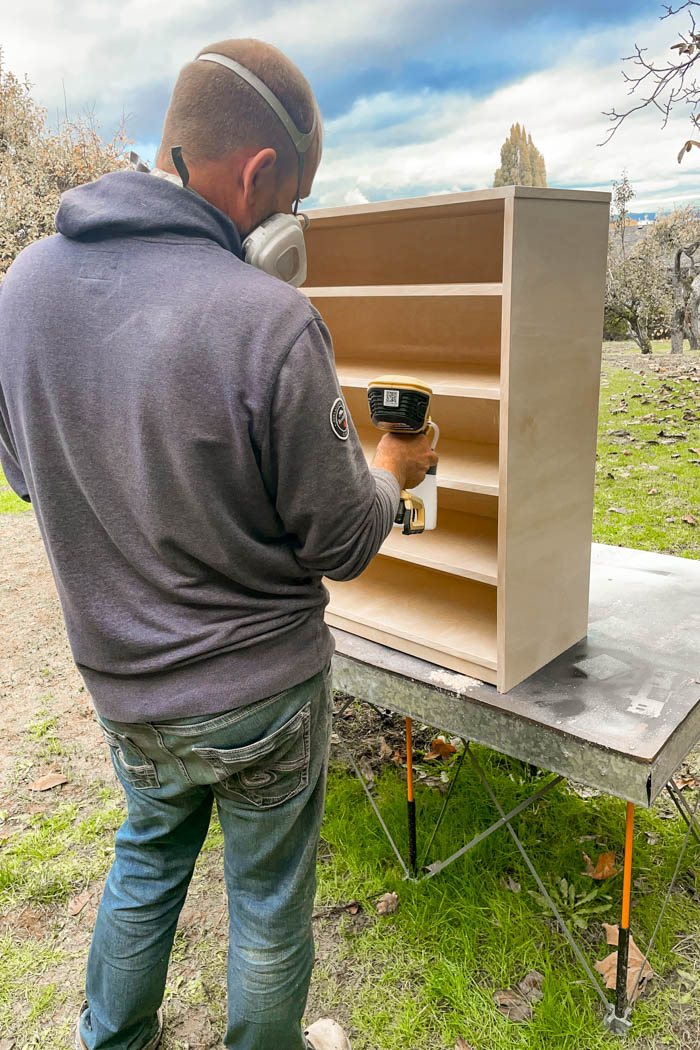
Once all the glue is dry you can pick your finish. We decided to just add a clear finish to the entire shelf. We applied the finish with our paint sprayer. You can also use a brush and/or roller but we find the paint sprayer is quick and gets into all the corners easily while giving a nice smooth finish.
Easy DIY Lego Storage Solution & Display Shelf – Free Build Plans!

We couldn’t be happier with how the shelving unit turned out. It was the perfect solution to our kids large Lego collection and the opening shelving and clear storage bins looked great too. It matched perfectly with our Lego storage table we previously made and into the kids room.
Building a Lego shelf is a great way to store all your kids Lego pieces and keep those pesky loose pieces off the floor. Depending on the amount of Legos you need to store or the type of storage you want the shelf design is easily changed to fit your specific Lego storage system needs.

If you missed the link, check out Kreg Tools Project and Plans to download a free copy of the PDF plans. Kreg’s site has lots of great build plans you can download and follow step-by-step!
If you loved how this project turned out, be sure to check out the DIY Lego Table we built. You can get the free plans here or check out the YouTube video on it below. The Lego table is a perfect match to
Other Lego Storage Options
If you are looking for a different type of Lego brick professional organizer, or a quick and easy Lego storage organizer be sure to see the list below for some clever ways to store all your Lego. There are lots of lego storage ideas you can implement to store all your Lego bricks!
- Lego Play Mats
- Lego Container Bins with storage compartment
- Lego Display Cases
- Lego Lego Minifigures Case
- Lego Brick Storage Bin
- Lego Storage Head
- Multi Level Display Case
All of these are clever ways to store your Lego building bricks. Weather you are trying to come up with lego storage for small spaces or a large collection there are a lot of great choices for your lego building and storage needs!
Other Kid DIY Projects
If you are looking for other Kid Build Plans and DIY ideas be sure to check the links below:
Kids Dress-Up Wardrobe
This cute little dresser is the perfect build for the princess in your family! Store all your kids dress up costumes and accessories in this cute cabinet! It even has a hidden compartment at the bottom!
DIY Kids Table Made with Scrap Plywood
This Table is a great way to use those scrap pieces of wood and create a cute play surface for your little DIYers! Our kids loved using this table for all their crafting and play kitchen needs.
DIY Kids Indoor Playhouse
This indoor playhouse with entertain you children for house! Or would make a cute reading space for your avid reader! This was a really popular build by our kids. It was a great place to store stuffies and blankets to make it a cozy space for your kiddo.
Easy Toy Organization [and labels to help your kids clean up Cricut!]
Check out this post for some great tips on how to organize your children’s play space! We turned a simple IKEA shelf and bin system into a easy to use custom storage solution for all our kids books and toys.