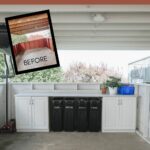
Easy DIY Home Recycling Station on a budget! Great ideas for an organized and functional recycling station.


After moving to a new home this year, there were a lot of elements from our previous finished, organized home that we were missing. One of the simple luxuries we missed was our DIY recycling center. Since we don’t have space for an indoor one anymore, and the entire kitchen will likely get an overhaul, we decided to build our Home Recycling Station outdoors.
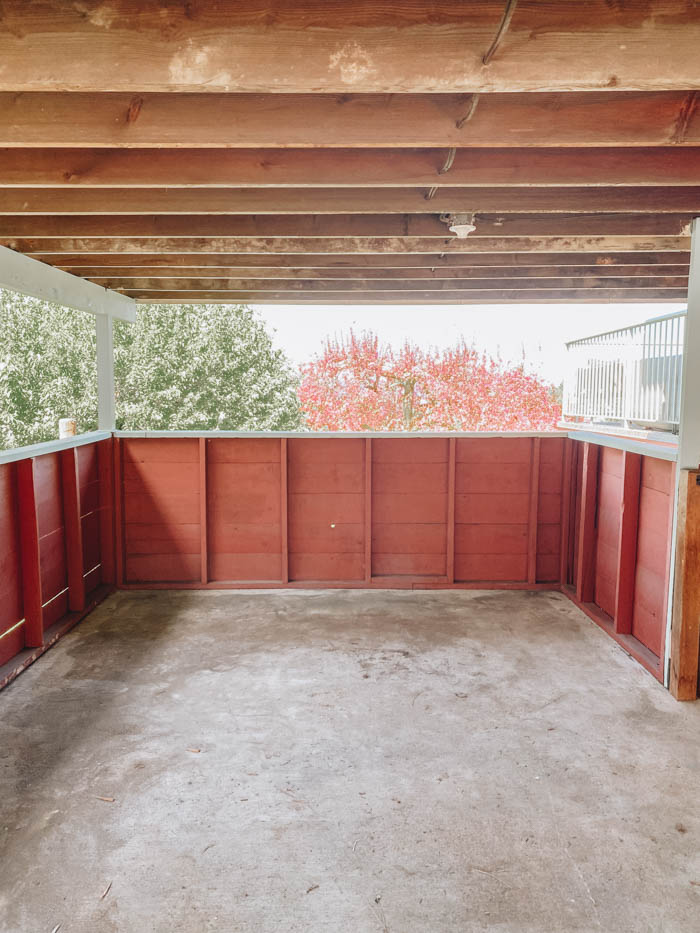
We quickly went to work planning out a new space where we could organize, sort, and store our recycling goods. The carport was a great option for this storage, but it was in need of some brightening up so we decided to do a quick makeover on a budget.
*This post was sponsored by Wagner and may contain affiliate links. When you buy a product through one of our links, we get a commission at no cost to you! Thank you for supporting our blog so that we can continue to bring you posts like these. For more information, please see our disclosure page.*
Carport Makeover
Painting
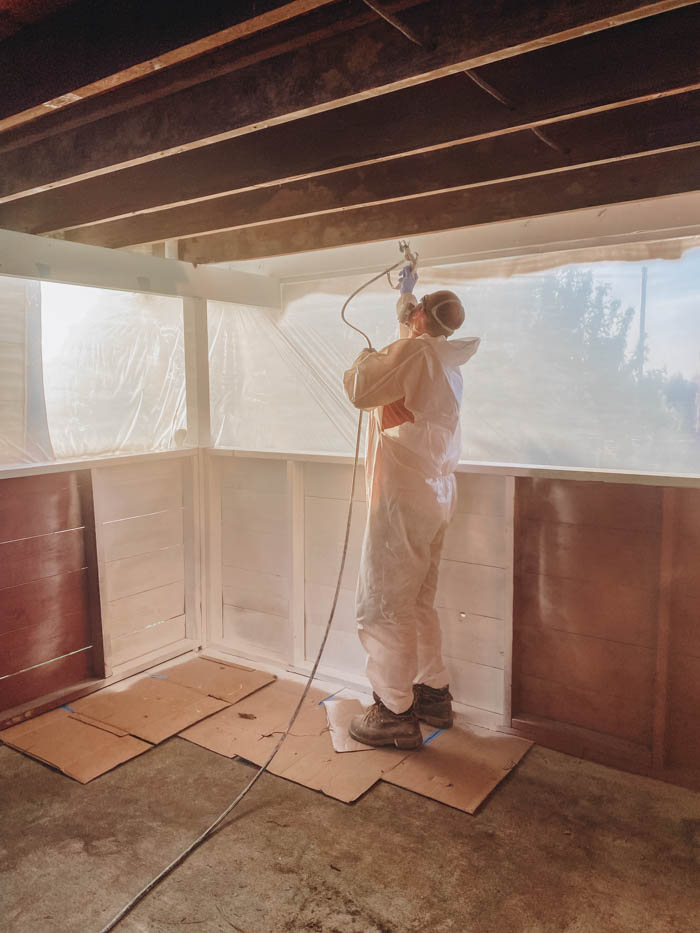
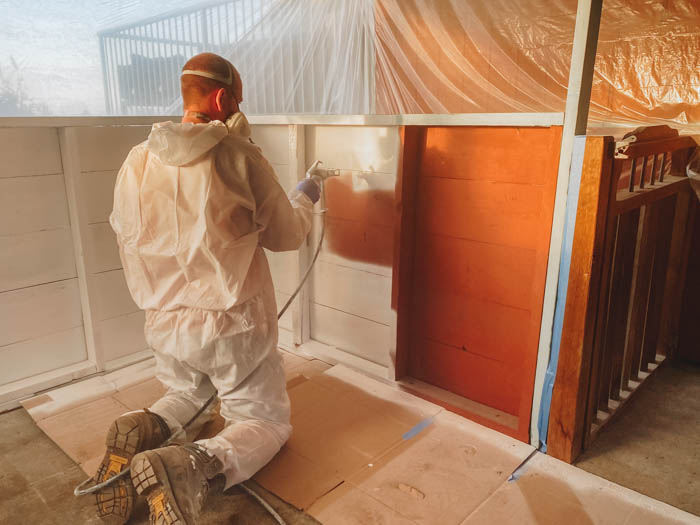
The first step to our DIY Home Recycling Station was too freshen up our carport. The ceiling area had never been painted and looked dark and gloomy. Luckily we had some left over paint from previous projects and our favourite painting tool, our Wagner Control Pro 170 Paint Sprayer.
Prepping the Space
Before starting spraying paint we got to work taping and masking off all the walls and areas we didn’t want to paint. To protect the concrete floor we used cardboard along the base of the walls.
Primer
We applied BullsEye 1-2-3 primer using the Control Pro 170, it worked great and made it quick and easy to get great coverage on all the surfaces of the underside of roof. This primer works great and it is good for exterior applications and has some great stain blocking properties.
To properly seal and prep ceiling area, two coats of primer was applied. This was likely due to the age of the wood and from some old water stains from a leaky roof.

Exterior Latex Paint
With the primer was applied and dried we added some white exterior latex paint. This really brightened the carport and refreshed the space. Again, the Control Pro 170 made quick work of paint all the edges, ends, corners and flat surfaces of the car port roof and trusses. Painting this with a brush and roller would have taken forever!
The Wagner HEA sprayer was really the star of this makeover, it made the painting portion of this job quick and easy, and allowed for a high quality and professional looking job of the space.
Lighting
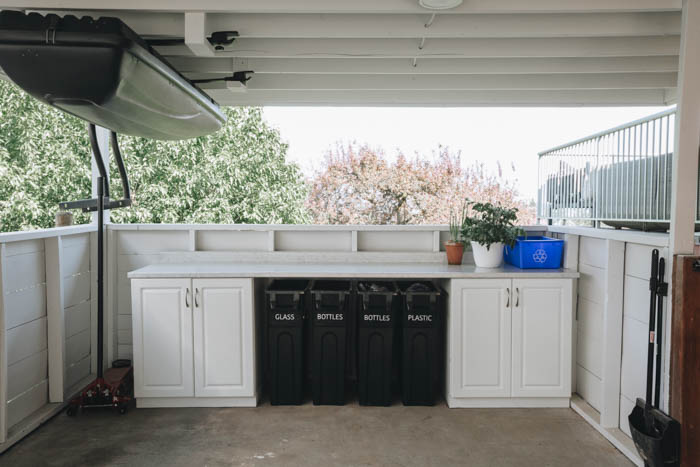
We switched out the old lighting for slim LED exterior pot lights. This wasn’t necessary, but the old lights stuck out from the ceiling, and the new ones matched the aesthetic much better.

Adding Organization
We needed an area to collect and sort all our recycling. Lucky the carport layout had a small area at the end that was perfect for this. We lucked out and got some old kitchen cabinets for FREE (which is the best price, lol).
We added a base to the underside of the cabinets to protect them, and also painted that with a coat of primer and exterior latex paint. You can see this process in the Carport Makeover video.
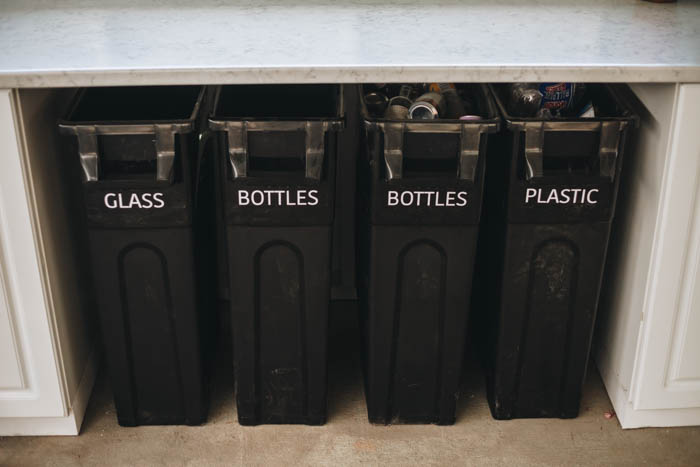
To finish off our cabinets we added a 10′ long countertop on top we bought at our local building supplies store. We also found some recycling bins that fit perfectly between the cabinets and voilà, we had our new recycling center.
DIY Labels
To help with sorting we used out Circut Joy to add some labels to the front of the bin. You can check out our “5 Quick Changes to Reduce Waste at Home [and DIY Cricut labels for them!]” post to learn how to make your own custom labels!
The cabinets were used to store car maintenance and cleaning supplies, but could also be used for garden/flower box tools, yard maintenance, etc (really anything that makes sense for your specific space and needs.


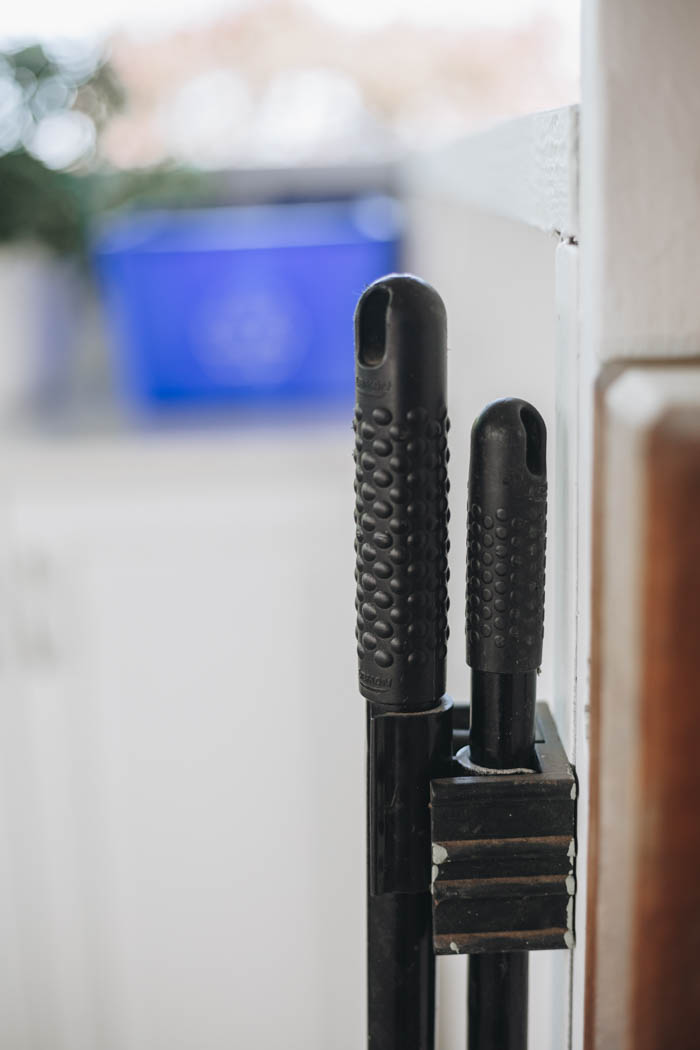
To keep some awkward shaped items off the floor we also build some overhead storage out of some old 2x4s we salvaged. To store our vehicle roof top carrier we made some “L” brackets and attached them to the carport’s roof. We also made a bracket for the truck headache racks (which we use to haul our paddle board and kayak).
Finished DIY Home Recycling Station and Carport Makeover

This space was a quick makeover but added some awesome organization. The space also feels a lot brighter and cleaner. Wagner’s Control Pro 170 made quick work of painting the ceiling and walls. The best part is we finished this space on a budget:) Now we can move onto the next space!


Carport Makeover Video
If you want to see the individual steps for how we created this DIY Home Recycling station, check out the video below!
Don’t forget to subscribe to our YouTube channel!
Looking for more Recycling Ideas? Grab the free plans for our DIY Recycling Station. Easy to build for indoor or outdoor use!