
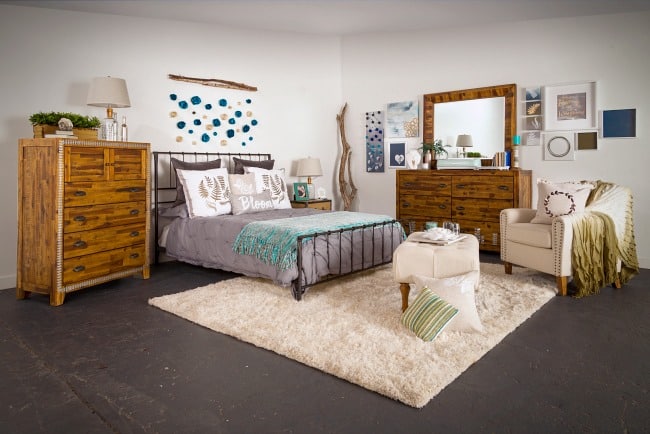
When you look at this bedroom photo, what do you see? I see a beautiful personalized space, full of DIY’d furniture and DIY home decor. Would you believe it if I told you that this bedroom had over 20 customized DIYs?! A couple of months ago, I had the opportunity to travel down to the US, meet with four other amazing DIY bloggers, and put this room together. It was the BEST experience, and I’m gonna tell you all about it!

*This post was sponsored by Cricut and may contain affiliate links for your convenience. For more information, please read the disclosure policy*
Did I ever tell you that my DIYing days started with scrapbooking? As a scrapbooker, I was drawn to the Cricut long before I even started a blog. At that time I was mostly making paper crafts, but as the Cricut evolved into the Cricut Explore Air™ 2, and I evolved in my creative skills, I started to see a LOT more potential in that little cutting machine.
So when I was given the opportunity to come down to the US to help create an entire, cohesive room, I jumped at the chance! Home Decor projects with the Cricut?! Yes please!
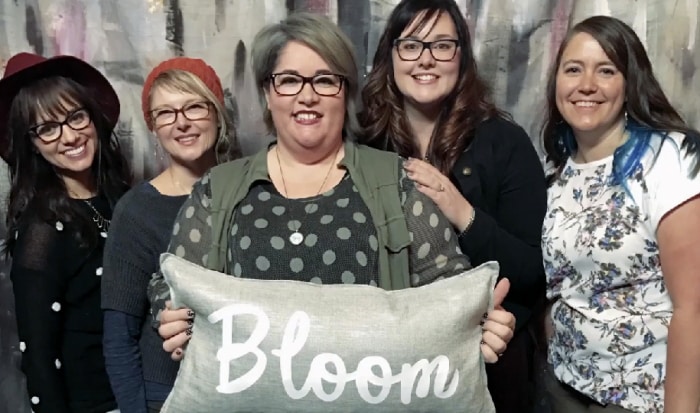
I met with Heidi from Idieh Design, Katie from the Crafty Blog Stalker, Heather from Whipperberry, and Jen from Jennifer Rizzo Designs. Four bloggers with four totally different styles – I know that I wasn’t the only one wondering if we could pull this room together! You can watch a video of us chatting about bringing our styles together HERE!

We were given absolutely beautiful furniture pieces from Hayneedle, which 100% jived with my Rustic Industrial side. But I’m not going to lie… needing to incorporate soft, floral, garden themed elements into the space was a BIG challenge for me and my Industrial Chic style.
BUT, I did it! And now my design dreams have come true and I have projects in the Cricut Design Space! Or you can check out all of the amazing projects on their Home Decor page!
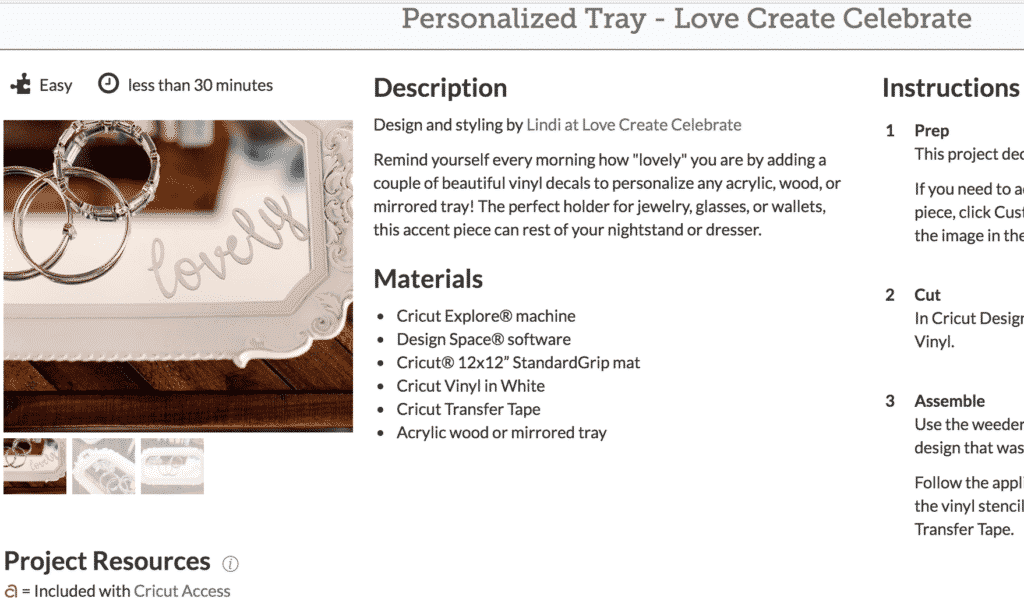
I was assigned a dresser and an object on top, so I decorated a mirrored tray for on top of the dresser with some simple vinyl overlays!
See the whole Personalized Tray HERE.
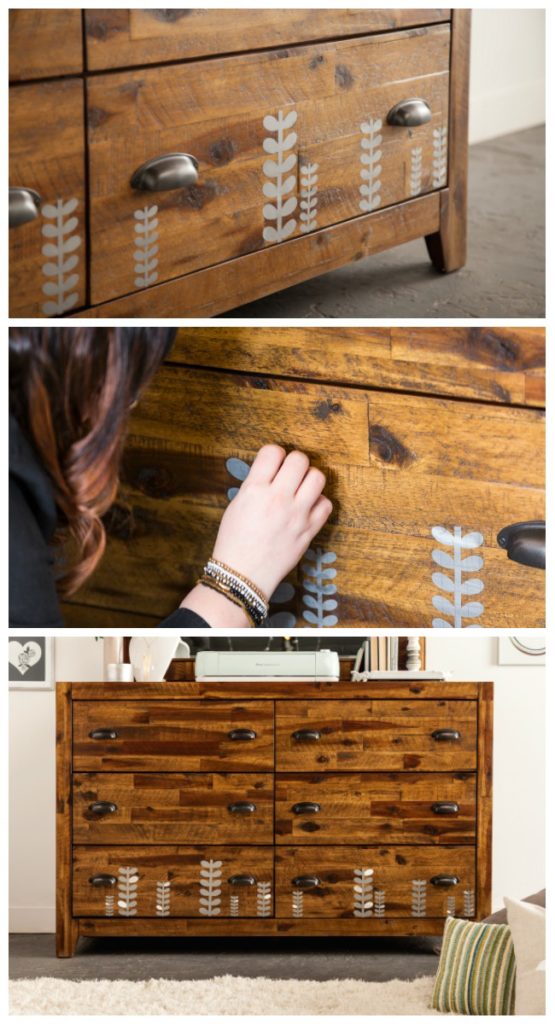
I wanted to add something subtle to the dresser, that stayed within the theme I was given, and used the images I was asked to incorporate, so I decided to add some beautiful vines to the bottom drawers of this dresser, as though they were growing from the ground. I love the look of the Metallic Foil against the wood (I can’t wait to do another project with that Metallic Foil!). The Transfer Tape made this project SO easy too!
See the entire Dresser Makeover HERE.
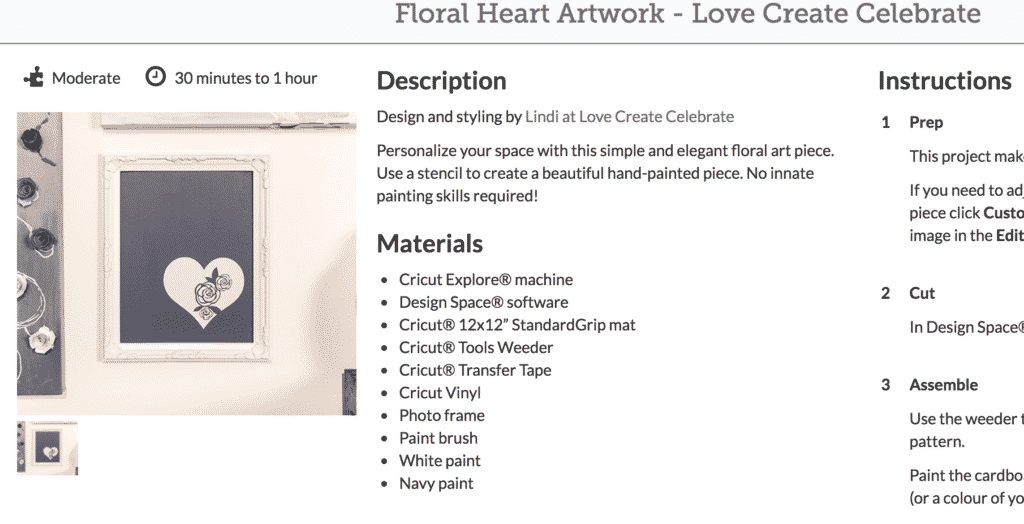
I was also in charge of making a couple of gallery wall pieces. So I kept the floral momentum going with this lovely vinyl Heart Art.
Find the whole tutorial HERE.
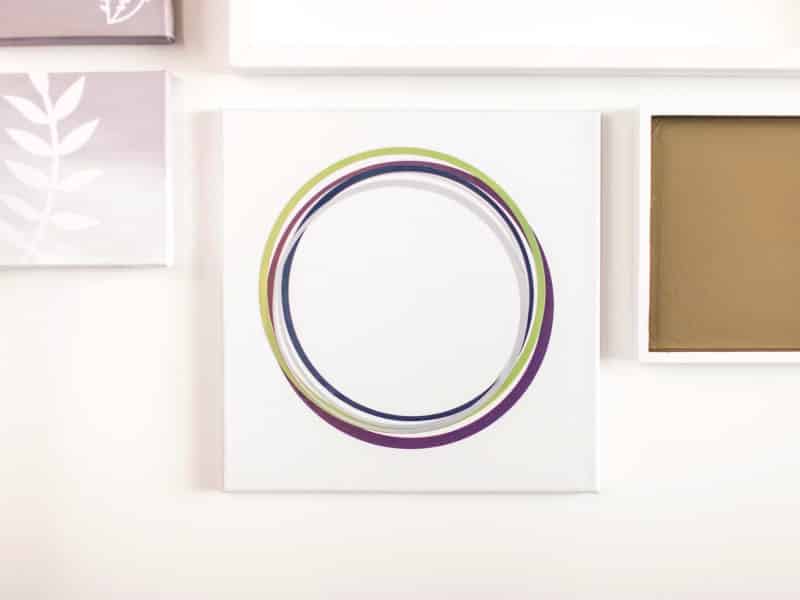
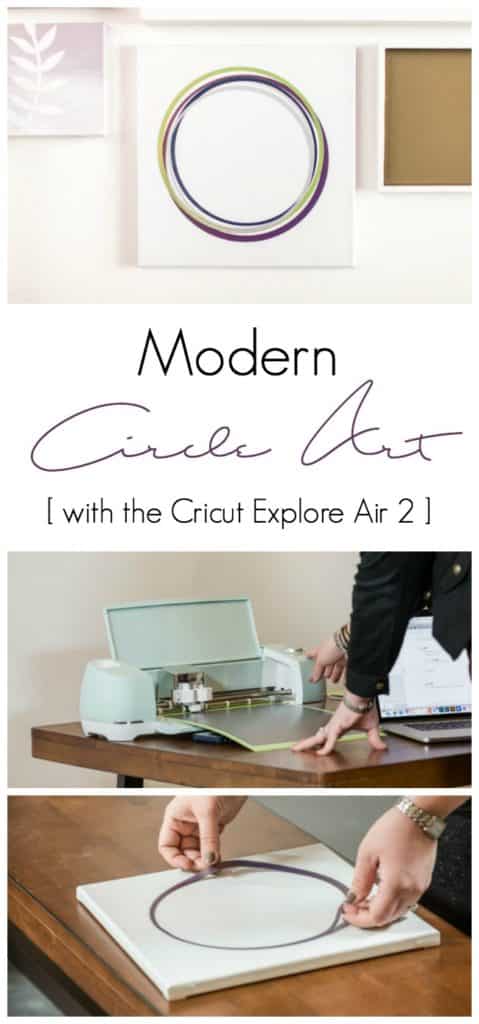
And finally my FAVE project of the day. I used Cricut Vellum to create this Modern Circle Art, and it only took about ten minutes!

I LOVE the way the vellum circles change in size and width and how the colours overlap one another. This is probably going to be recreated in my home!
I’m sharing the a great tutorial for this project on the Cricut Blog today if you want to check it out!
Now it’s your chance to win!
You could win a Cricut Explore Air 2 Bundle + a stylist consultation from yours truly! This giveaway is open to Canadian and non-US residents. US residents can enter a giveaway at https://home.cricut.com/home-decor!
Good luck!
Follow along for more updates on Instagram with Cricut and Hayneedle! Tag your own Cricut Home Decor projects with #MyCricutStory!
WONDERING WHAT MATERIALS TO USE WITH THE CRICUT?! CHECK OUT THESE GREAT IDEAS!


This is a sponsored conversation written by me on behalf of Cricut. The opinions and text are all mine.
Anel
Friday 24th of February 2017
I would ask about decorating walls with your own sentcils and how to get it to stick without bubbles
Rachel C.
Thursday 23rd of February 2017
I would ask how to make a large stencil of a compass for my floor. I figure it has to be cheaper than buying one, but do not know how to do it.
Helene Monette
Tuesday 21st of February 2017
Just WOW !!!!
So inspiring !!!
Tina Robinson
Tuesday 21st of February 2017
First of many would e what is the best way to transfer the cut to whatever you put it on. I have tried with another machine but seem to always mess it up! Is there a trick?
Moe Bwell
Tuesday 21st of February 2017
Is it difficult to get the transfers off walls and furniture?