
Declutter your workspace effortlessly with a DIY Desk Organizer! Turn an old thrifted find into a modern & minimal office holder!

In today’s work-from-home world, keeping our workspaces organized is essential for productivity and peace of mind in the home office. Nice desk organization can be expensive, so we took this old mail holder for $2 and turned it into something that looks high-end, but only costs a few dollars!
*This post may contain affiliate links. When you buy a product through one of our links, we get a commission at no cost to you! Thank you for supporting our blog so that we can continue to bring you posts like these. For more information, please see our disclosure page.*
How to Make a DIY Desk Organizer
When I needed some organization in my more feminine office, I made this cute and functional Felt Wall Organizer. Now that I’m sharing a home office space with my husband, we needed something that suited both of us, and could also handle all of our desk supplies.
Tools:
Materials:
Step 1: Thrift Store Hunt
The first step in creating your DIY desk organizer is to embark on a thrift store adventure. Explore the aisles in search of items that can be repurposed into compartments or trays for your organizer. Look for wooden boxes, trays, wire baskets, or small containers that catch your eye and suit your organizational needs.
Step 2: Disassembly
Once you’ve gathered your thrifted treasures, assess whether any items need to be disassembled to fit your vision for the desk organizer. For example, if you’ve found a larger item like a divided box or caddy, you may need to use a saw or hammer to separate it into individual compartments.
When we found this old mail holder, we bought it because we knew it was made out of real wood (which is always valuable!), but we didn’t have a plan for it quite yet. One day I was struck with inspiration and decided it was time to cut the mail holder apart and turn it into my DIY Desk Organizer.


Step 3: Sanding
With your pieces cut, it’s time to smooth out any rough edges and surfaces. Use sandpaper of various grits to achieve a smooth finish on each piece. Start with a coarser grit to remove any imperfections or rough spots, then gradually move to finer grits for a polished result.

Step 4: Filling Gaps
If you encounter any gaps or imperfections in the wood, use wood putty to fill them in. Apply the putty to the affected areas, smooth it out with a putty knife, and allow it to dry according to the manufacturer’s instructions. Once dry, sand the filled areas until they are flush with the rest of the surface.
Step 5: Assembly
It’s time to assemble your desk organizer. Arrange the pieces according to your desired layout, keeping in mind the functionality of each compartment.
Our pieces all had nice flat bottoms and flat backs after sanding, so I was able to assemble them behind one another.


Step 6: Painting or Staining
Now comes the fun part – adding color and personality to your desk organizer. Decide whether you want to paint the components in vibrant hues or stain them to enhance the natural beauty of the wood. We chose to paint because our plywood thrift find had a few spots that we weren’t able to patch. Also, the black matches our office decor.
Use paintbrushes or rags to apply paint or stain evenly across the surfaces, allowing each coat to dry completely before applying the next.

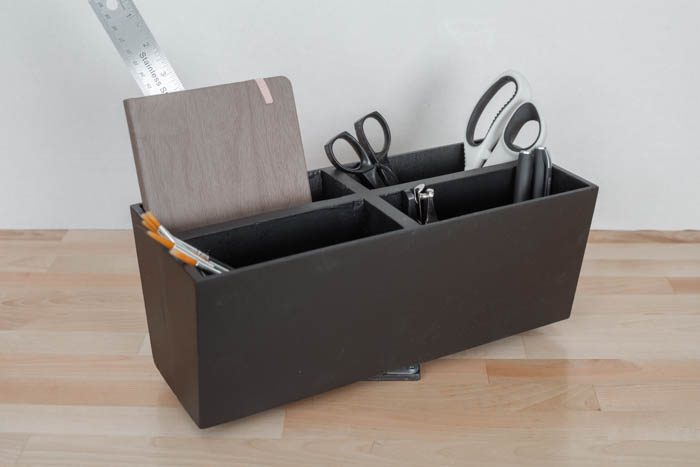
Step 7: Adding The Spinner
The final step isn’t necessary, but it’s a great addition to an otherwise ordinary piece. You can add a lazy susan spinner to the bottom of your piece. I was worried that the piece wouldn’t stay balanced resting on the spinner, but it surprised me! Even when the scissors and pens inside aren’t balanced, the piece stays steady.
Attach the spinner to the base of the organizer using a screwdriver and screws, ensuring it is centered and secure.


Our Finished DIY Desk Organizer
With your desk organizer assembled, take a moment to admire your handiwork. Place it on your desk and arrange your office supplies, stationery, or knick-knacks in your new, modern organizer!

Transforming thrift store finds is one of my favourite new hobbies! It’s always so satisfying to take something discarded and turn it into something functional, and if I do say so myself, pretty.


Thrift Flip Video Tutorial
Want to see how we flipped this DIY find in more detail? And see the mysterious DIY that we turned an old cutting board into! All in the budget-friendly thrift flips video.
How about a bigger storage solution for your home? Go check this IKEA Nordli Hack. I super enjoyed doing it – I bet you would too!
